
Viator Mapping
How to Map the Activities on ExperienceBank – Viator
This step-by-step article describes how to do the mapping of Viator Activities on ExperienceBank.
- Set-up your Account on OTA (Viator/TripAdvisor)
- Login to ExperienceBank
- Enabling Viator Marketplace on ExperienceBank
- Enter Viator Supplier Code on ExperienceBank
- Enabling Connection with Viator
- Download Viator Product CSV file
- Importing Viator Product CSV file to ExperienceBank for the first time
- How to map the Activities on ExperienceBank
Step 1. Set-up your Account on OTA (Viator/TripAdvisor)
You need to set up your account and upload your products on Viator/TripAdvisor with the help of your Viator Account Manager. If you already have an account with Viator/TripAdvisor and products are already set up, please continue to Step 2.
OR
To apply to Viator/TripAdvisor please visit this page: Click here to register your account with Viator/Tripadvisor
Step 2. Login to ExperienceBank
Click on this URL https://app.experiencebank.io/ to open the login page of ExperienceBank.
Now, use your supplier contact Email ID to login (In case, you forgot 🤔 the password, you can click on the Forgot password link to retrieve your password).
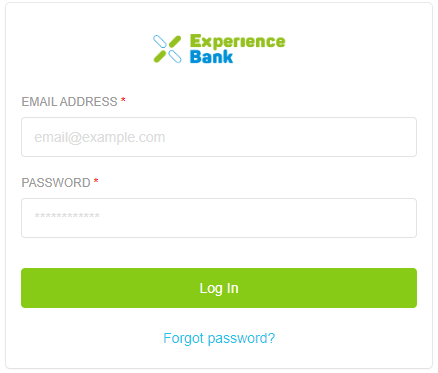
Note – For the login email ID & password of ExperienceBank, you have to contact your booking system.
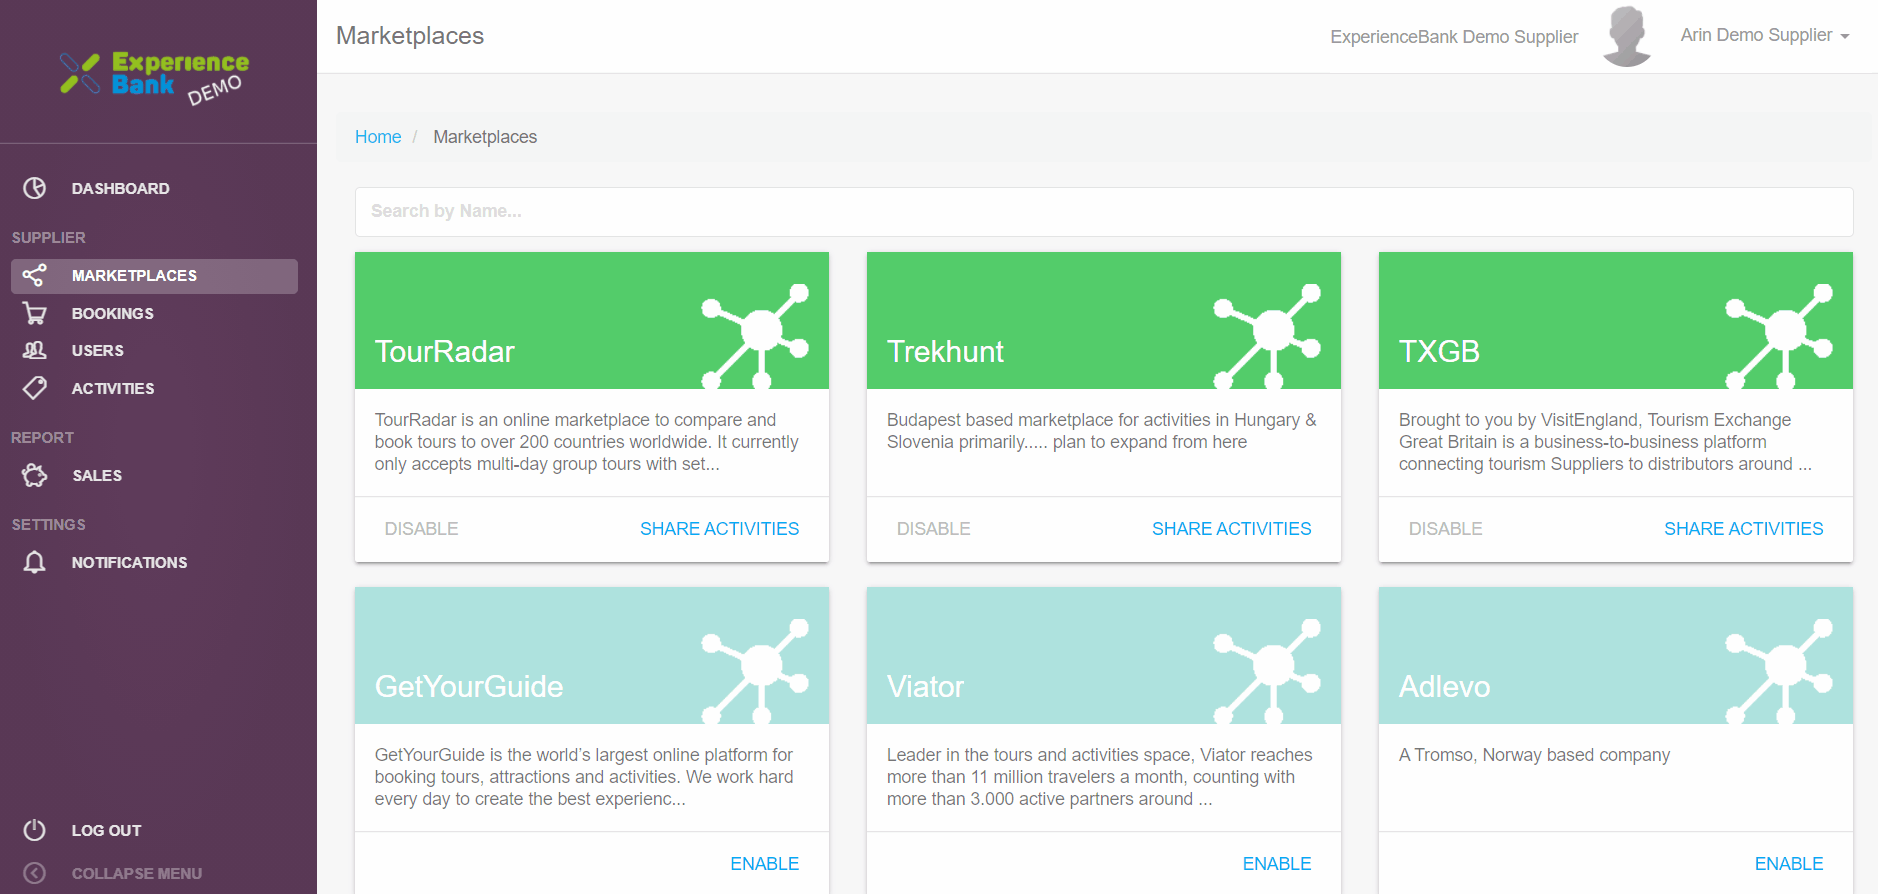
“Cheers 😃 After the successful login, now you’ll be redirected to the ExperienceBank dashboard”👇
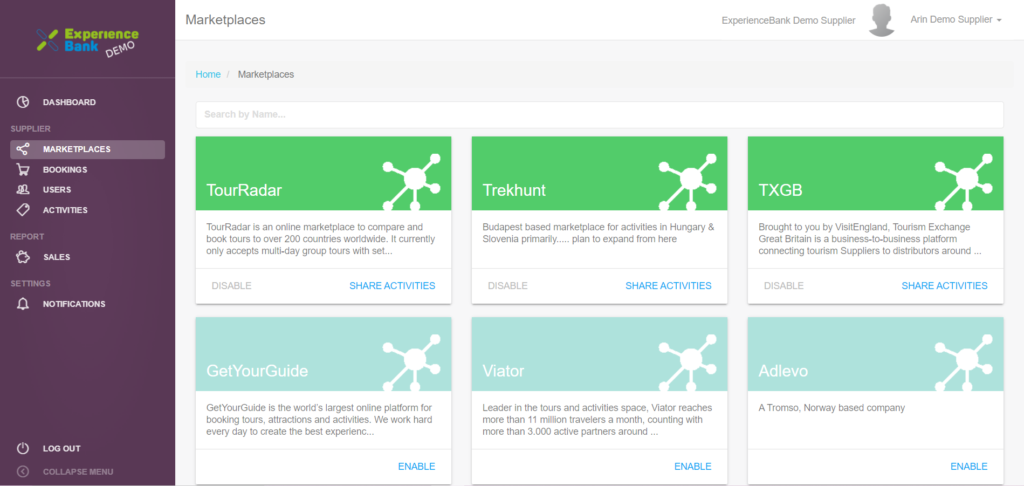
Note: – ExperienceBank Account created automatically by your Booking System. This will depend on the Booking system structure, whether they will create your ExperienceBank account through API OR Manually.
Step 3. Enabling Viator Marketplace on ExperienceBank
- Choose Marketplace in the sidebar menu
- Search for the “Viator” square
- Click ENABLE
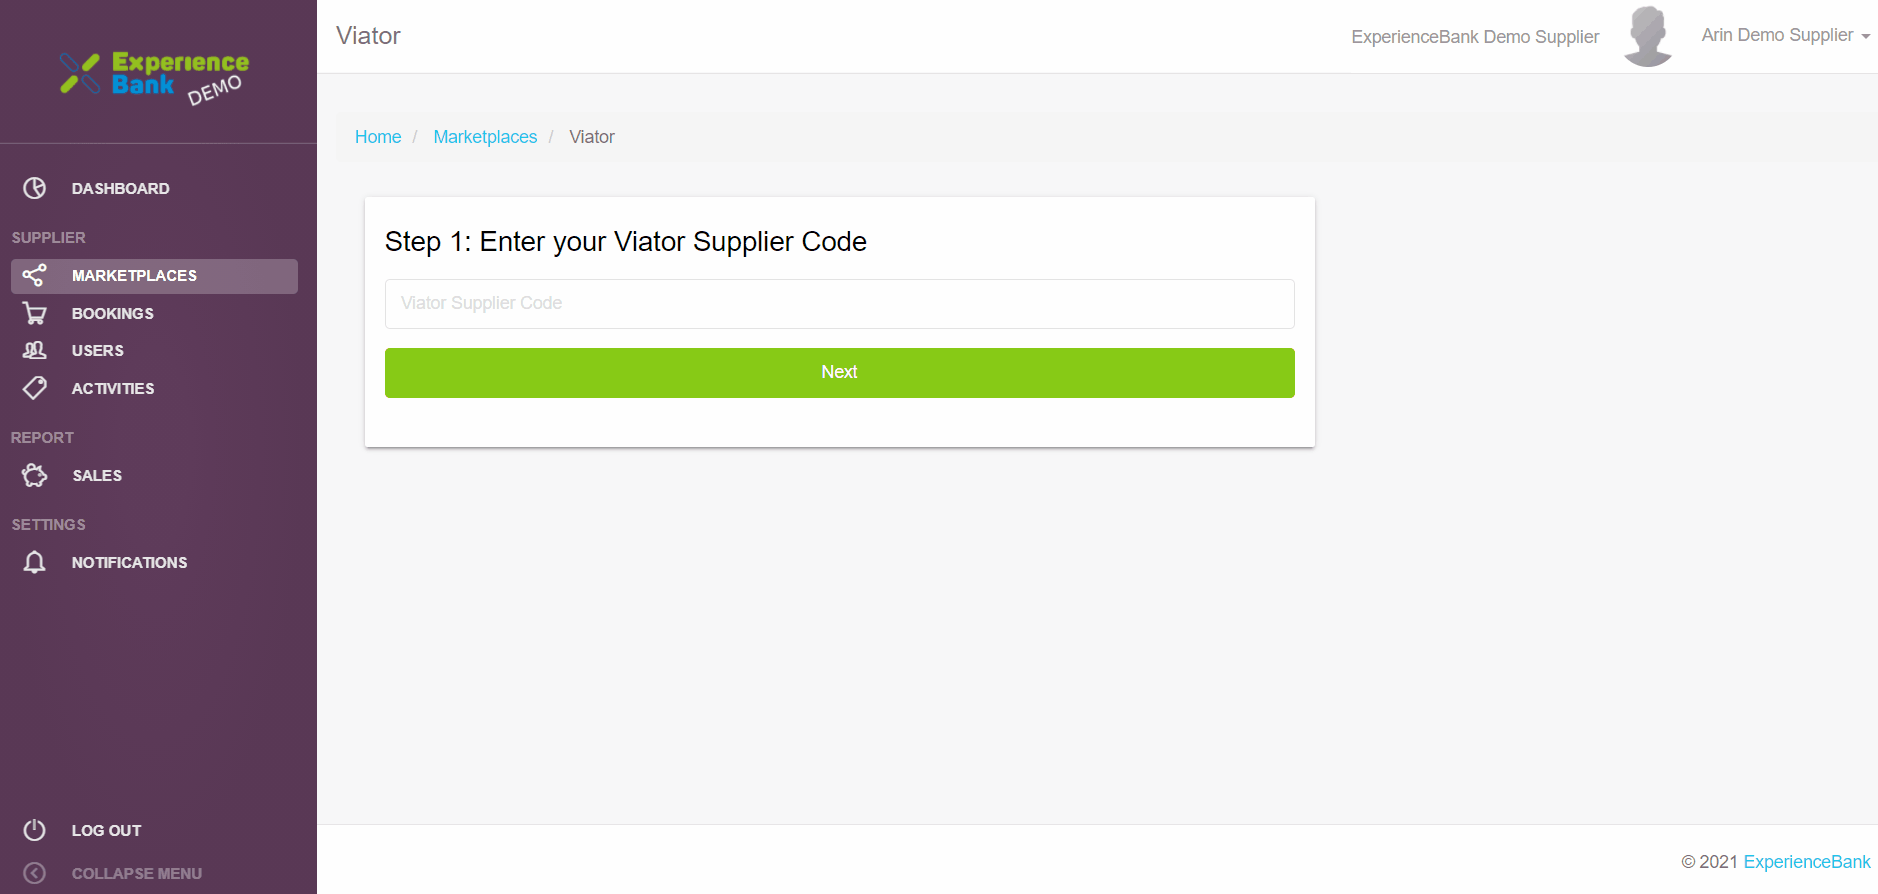
Step 4: Enter Viator Supplier Code
You will get the Viator Supplier Code from your Viator Extranet account. Please see the below attached image for your reference.
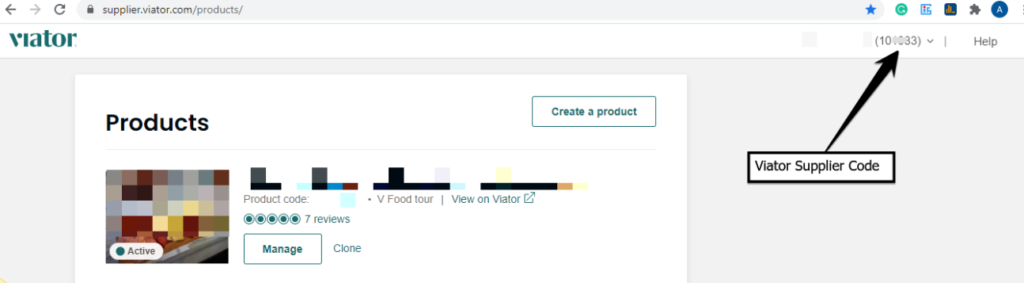
Once you will get the Viator supplier code you need to enter it on the box under Setp1. of ExperineceBank back office and click on the Next button.
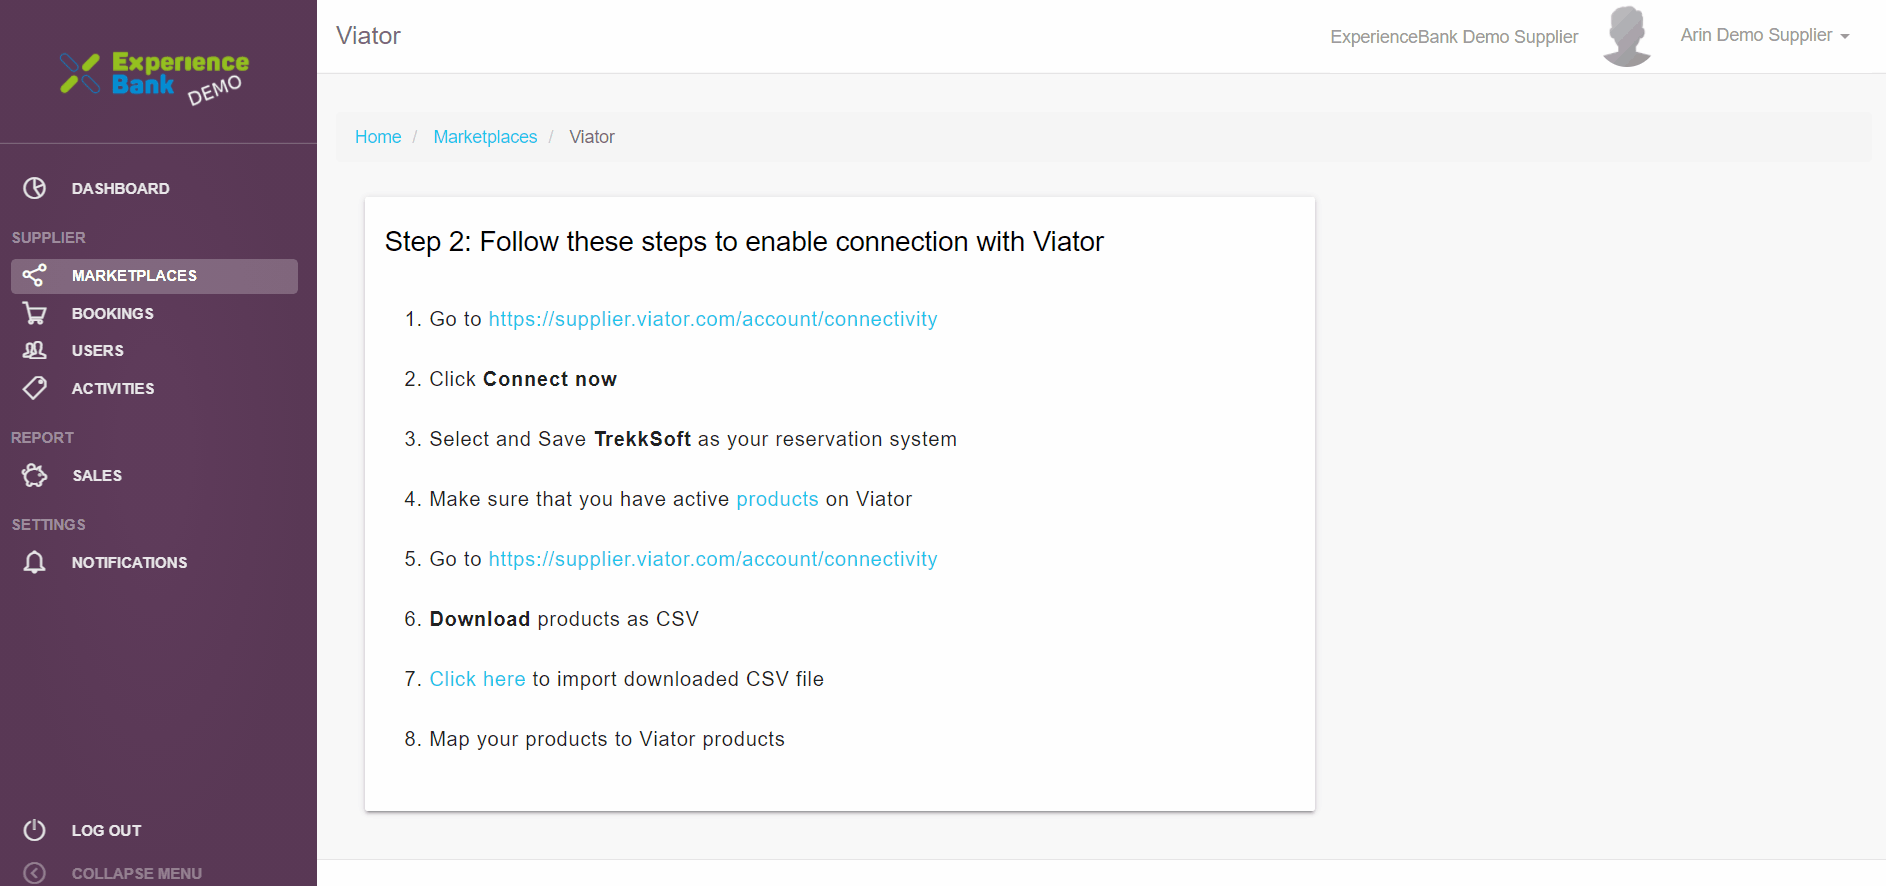
Step 5. Enabling Connection with Viator
To Enable your connection with Viator you need to follow these steps:
- Go to https://supplier.viator.com/account/connectivity.
- Login to your Viator Extranet Account.
- Click on the Connect Now button which is in the front of Connectivity details under the Connectivity tab.
- Select your reservation system as TrekkSoft from the dropdown list and click on the SAVE button.
The below image is for your reference.
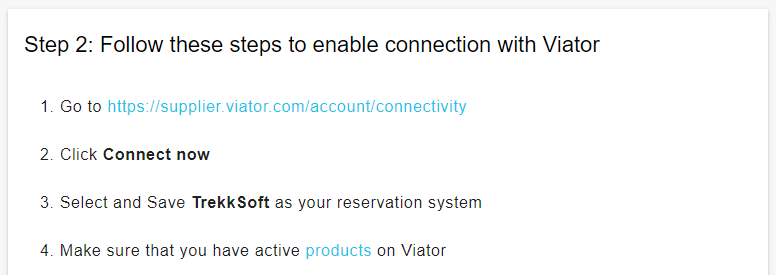
Note: Make sure that you have active Products on Viator.
Step 6. Download Viator Product CSV file
If you already under the Connectivity tab of your Viator Extranet Account, Click on the Download button which is in the front of the Downloads products as CSV, after clicking on the download button the Viator Product CSV file will automatically be downloaded in the download folder of your system.
OR
To download your Viator product CSV file you need to follow these steps:
- Go to https://supplier.viator.com/account/connectivity
- Login to your Viator Extranet Account.
- Click on the Download button which is in the front of Downloads products as CSV under the Connectivity tab.
- After clicking on the Download button, the Viator Product CSV file will automatically be downloaded in the download folder of your system
The below image is for your reference.

Step 7. Import Viator Product CSV file to ExperienceBank for the first time
- Click on the, Click here link of Step 7.
- A window will appear to browse the relevant CSV file.
- Select the Viator CSV file & click on the Open button to upload the CSV file on ExperienceBank.
The below image is for your reference.

When the CSV file products are perfectly uploaded on ExperienceBank there is a short popup message that appears on the top right corner.
✌ “Success. Products were uploaded successfully”
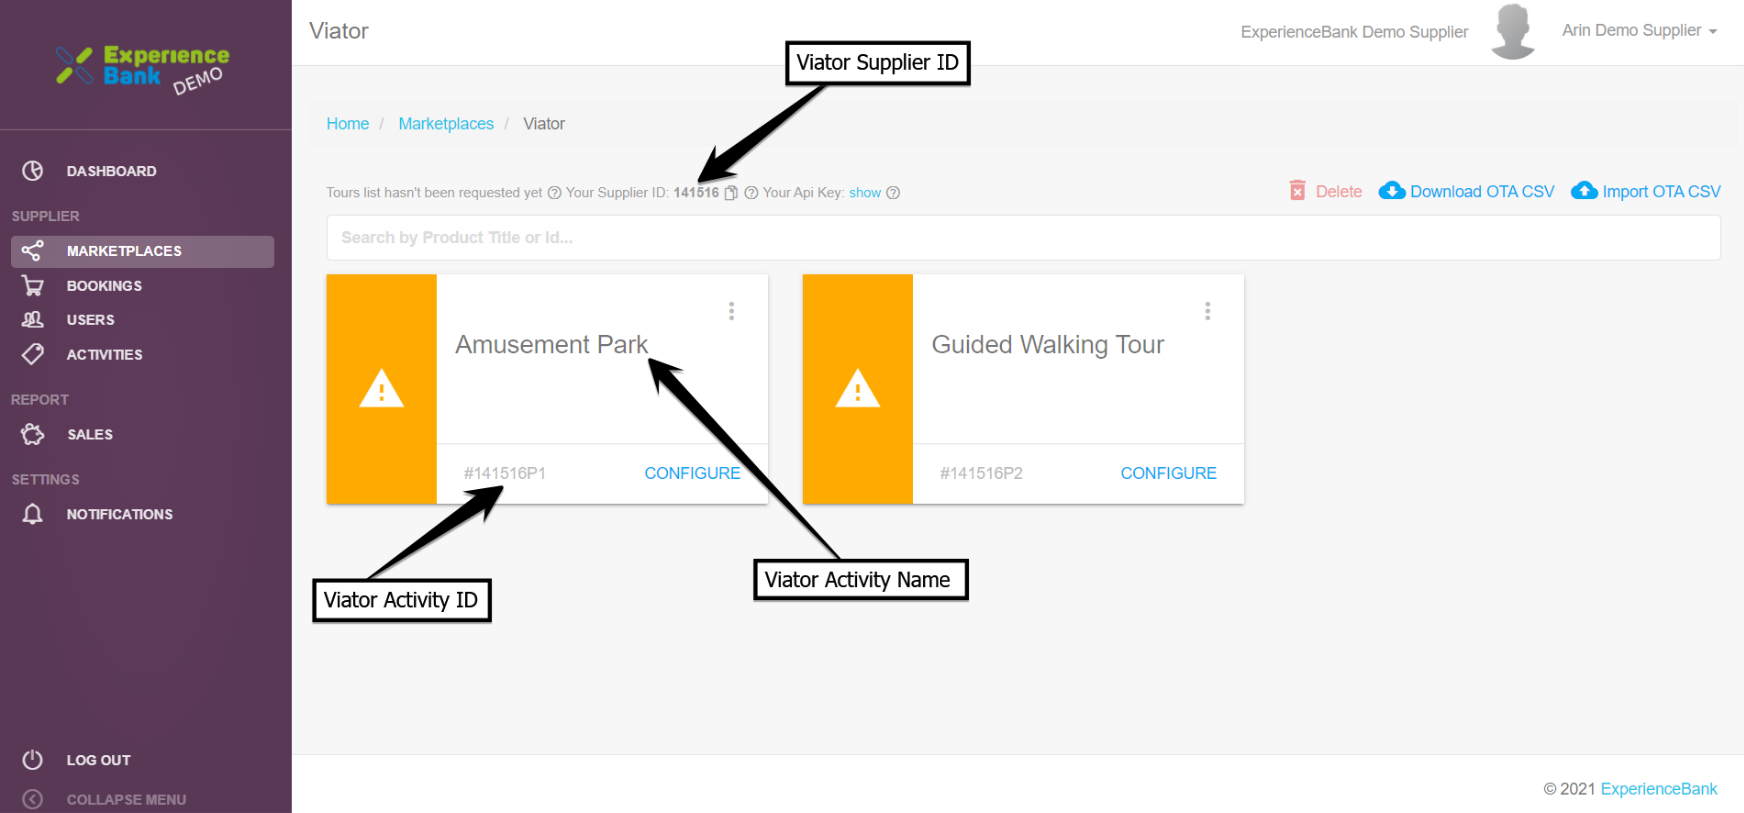
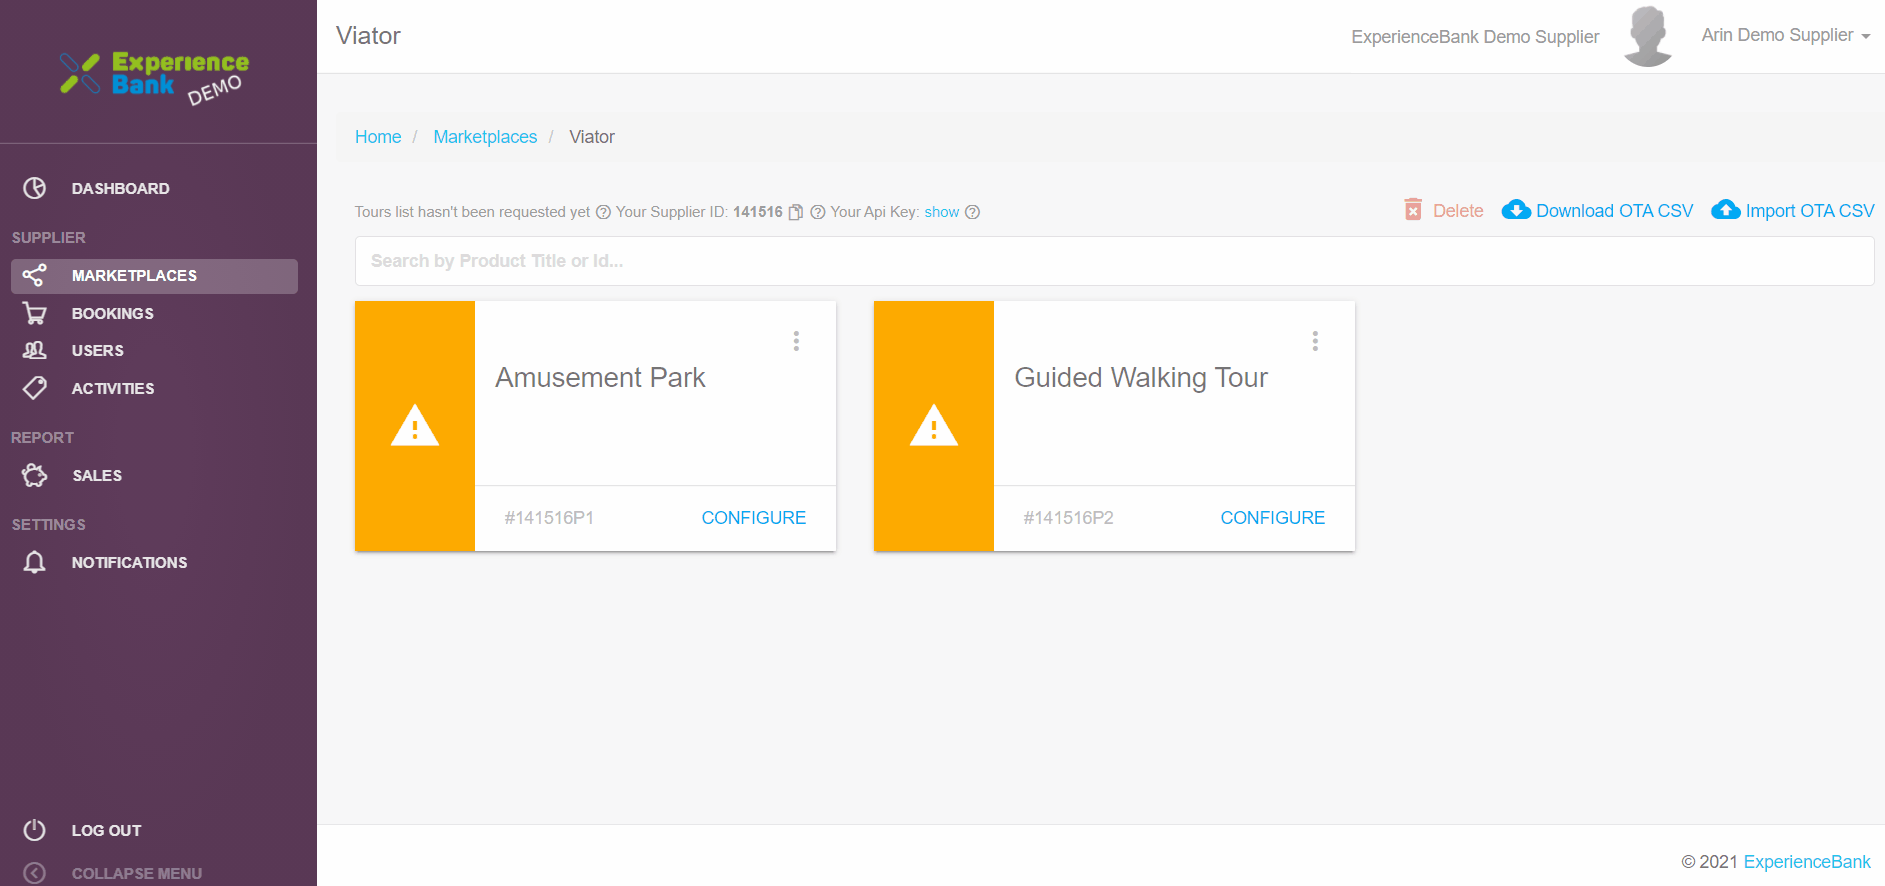
Cheers 😃 All unmapped products appear in Orange and are now ready for mapping 👇
Step 8: How to map the Activities on ExperienceBank
There are three simple steps for the Mapping of Activities:
1. Map the relevant Activities
- Find the product you would like to map ‘Amusement Park’ in the example below and click on CONFIGURE.
- Click on the dropdown under the Connect Your Activities option.
- In this dropdown, you will find a list of Activities from your booking system and you need to map these with the relevant Activity of your Viator.
- Select the desired Activity (“Amusement Park” in the example below) you wish to map.
- Click on the CONTINUE button.
🗒 Hint: You can also map several activities of your booking system to one marketplace activity.
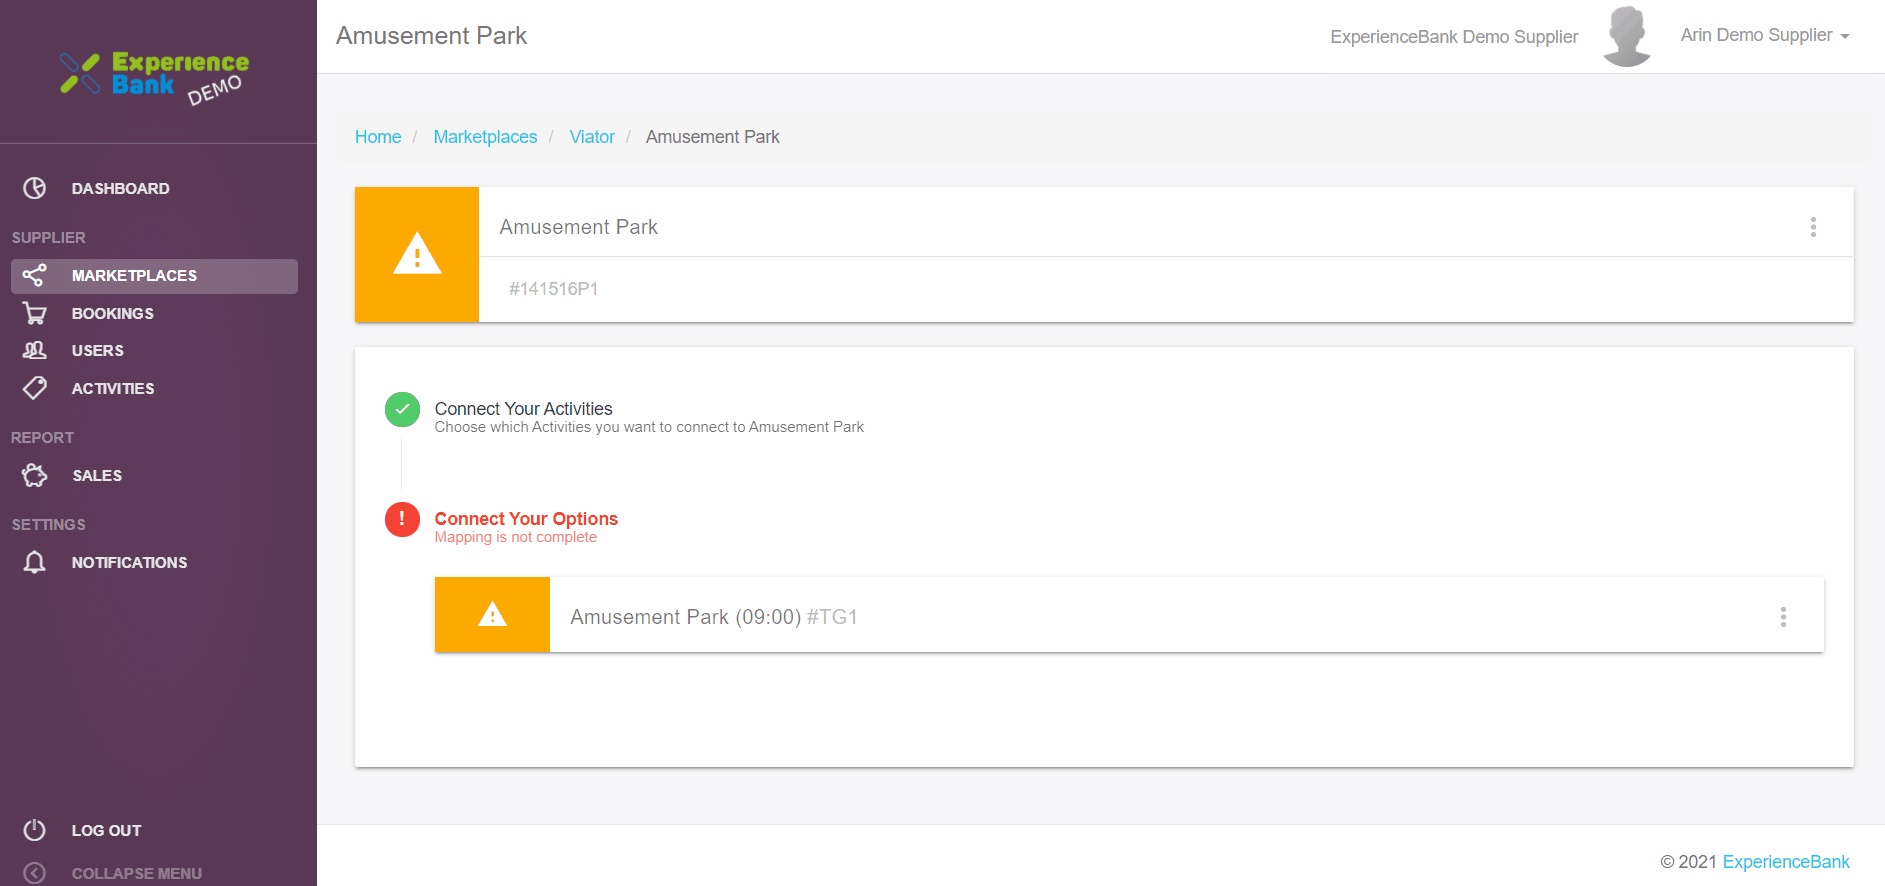
2. Map the Option
- Click on the Option [09: 00 AM time slot in ‘Option’ in the example below] under ‘Connect Your Options’.
- Then click on the “Click here to start mapping” under Step 1: Map Option.
- Click on the + button on the right side under Available for mapping options.
- Lastly, click on the SAVE button
- If you want to map the Ticket Category manually Please, see [Step 3 Map the Ticket Category ]
3. Map the Ticket category
To make your mapping faster and easier we applied the auto-mapping feature on the Ticket Category. That’s why we put an Auto Mapping button which is used to On/Off the auto mapping feature for Ticket Category.
How to map the Ticket Category manually-
I upload a GIF image that will tell you how to map the Ticket category if the auto mapping feature doesn’t work for you. For Example, #Adult will be a map with Adult type, #Child will be a map with Child type, etc.
- Click on the Adult Ticket category under Step 2: Map Ticket Categories.
- Click on the + button on the right side under Available for mapping ticket categories.
- Click on the SAVE button.
- Then repeat the above three steps for the remaining Ticket Categories,
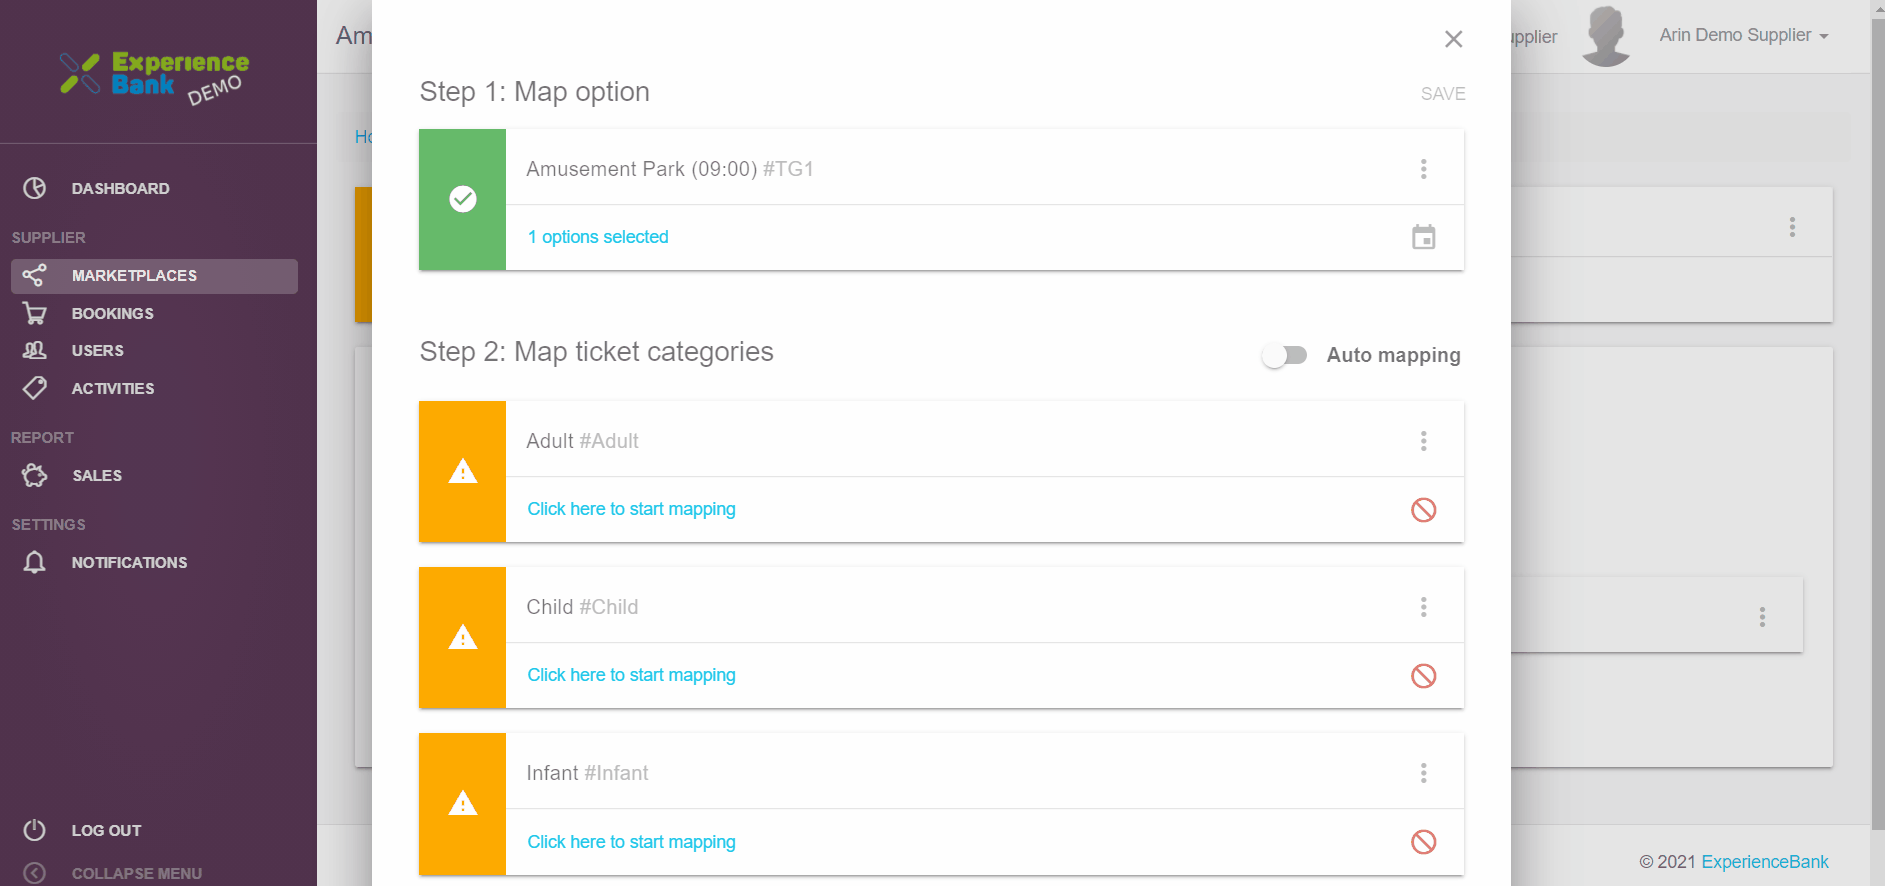
Note – To run the auto-mapping feature of the Ticket category correctly, please create the same name for the Ticket types on both ends (For Example Adult, Child, Infant, Senior, Student, etc)
After completing the mapping on ExperienceBank, you will also have to complete the mapping on the Viator Extranet. Please click on the link to visit – How to connect your product on Viator Extranet.