
Manage Users
How to Add New Users on ExperienceBank BackOffice

This article will show you how to Add New Users to the ExperienceBank BackOffice.
To add additional users to the ExperienceBank back office follow the steps below:
Step 1. Login to ExperienceBank
Click on this URL https://app.experiencebank.io/ to open the login page of ExperienceBank.
Now, use your supplier contact Email ID to login (In case, you forgot 🤔 the password, you can click on the Forgot password link to retrieve your password).

Note – For the login email ID & password of ExperienceBank, you have to contact your booking system.
Step 2. Open the User page on the ExperienceBank BackOffice
To open the User page on the ExperienceBank BackOffice, click on the USERS link under the Suppliers section.
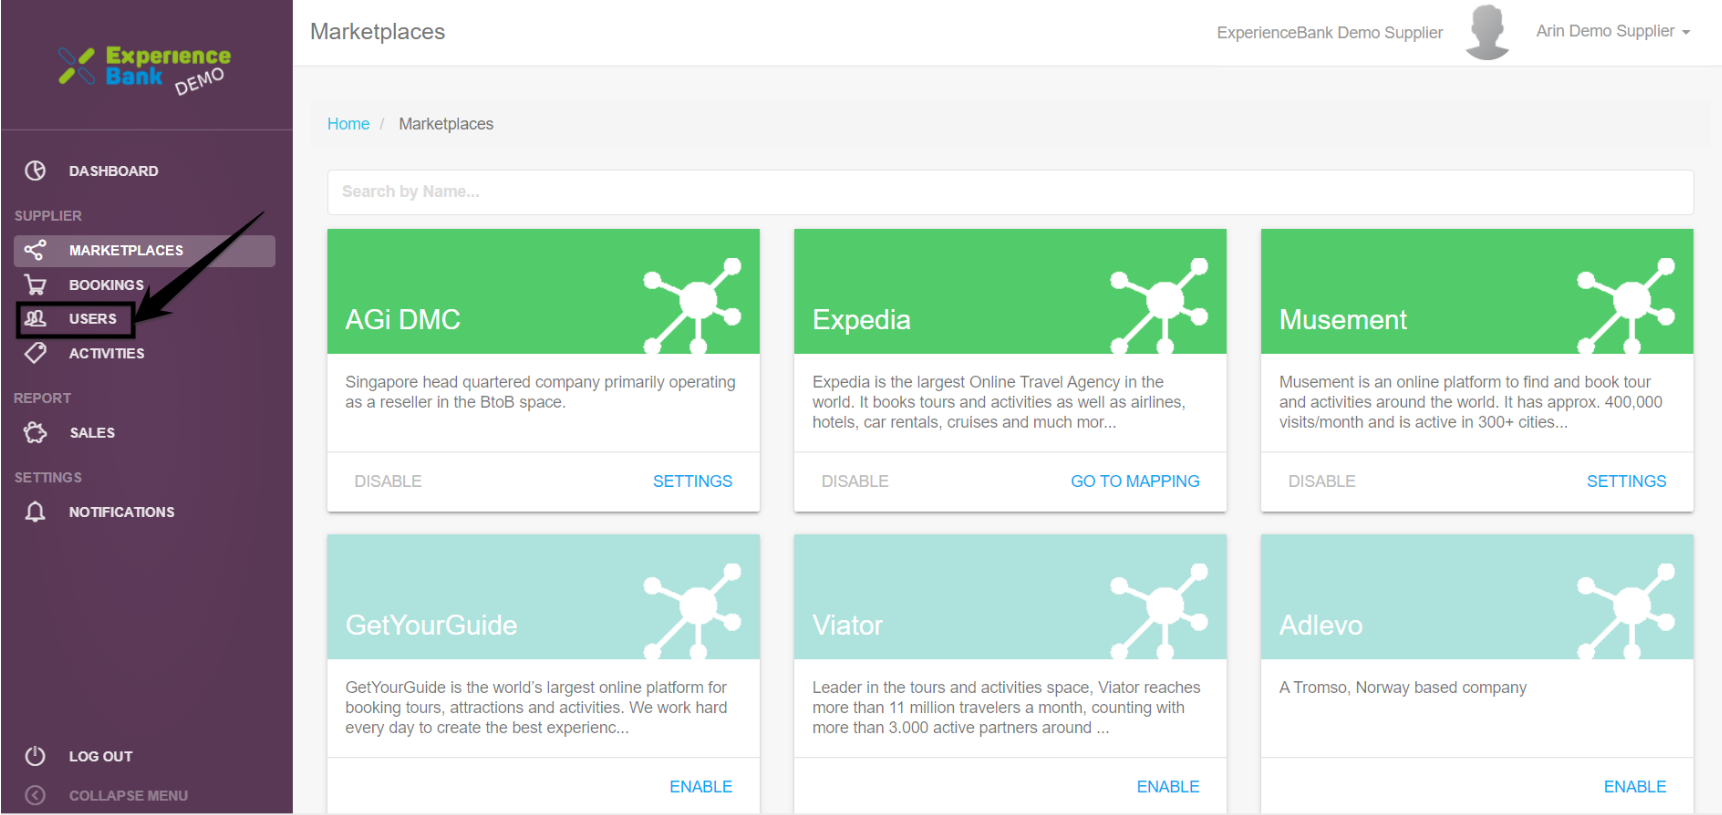
After clicking on the USERS link, A User page will load.
Step 3. How to Add a New User by using the |+Add User| button
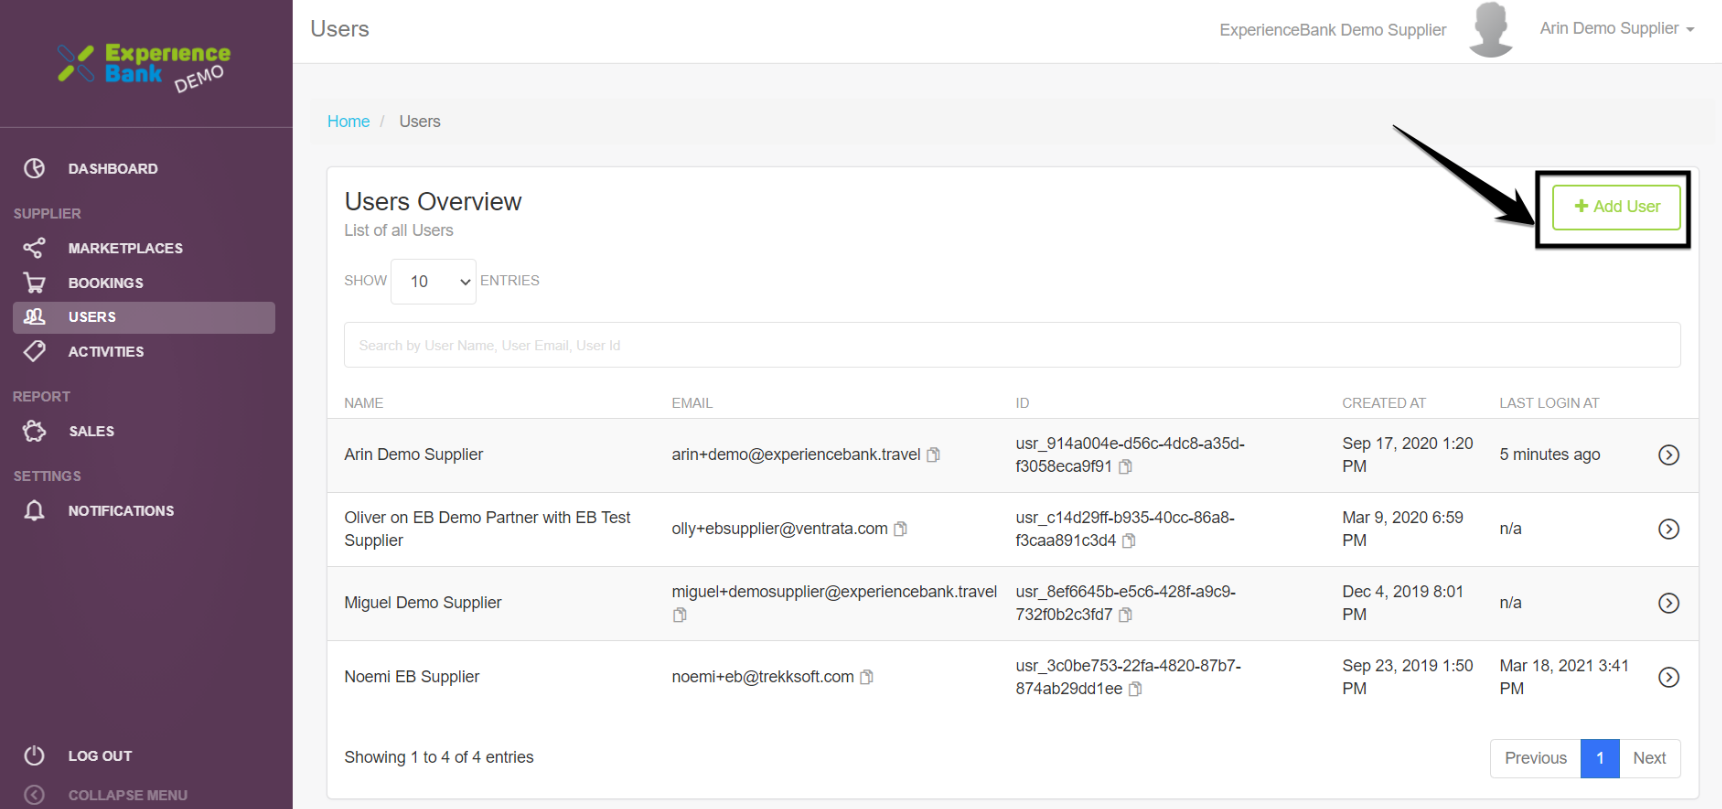
Click on the |+ Add User| button on the top right corner of the user’s overview page.
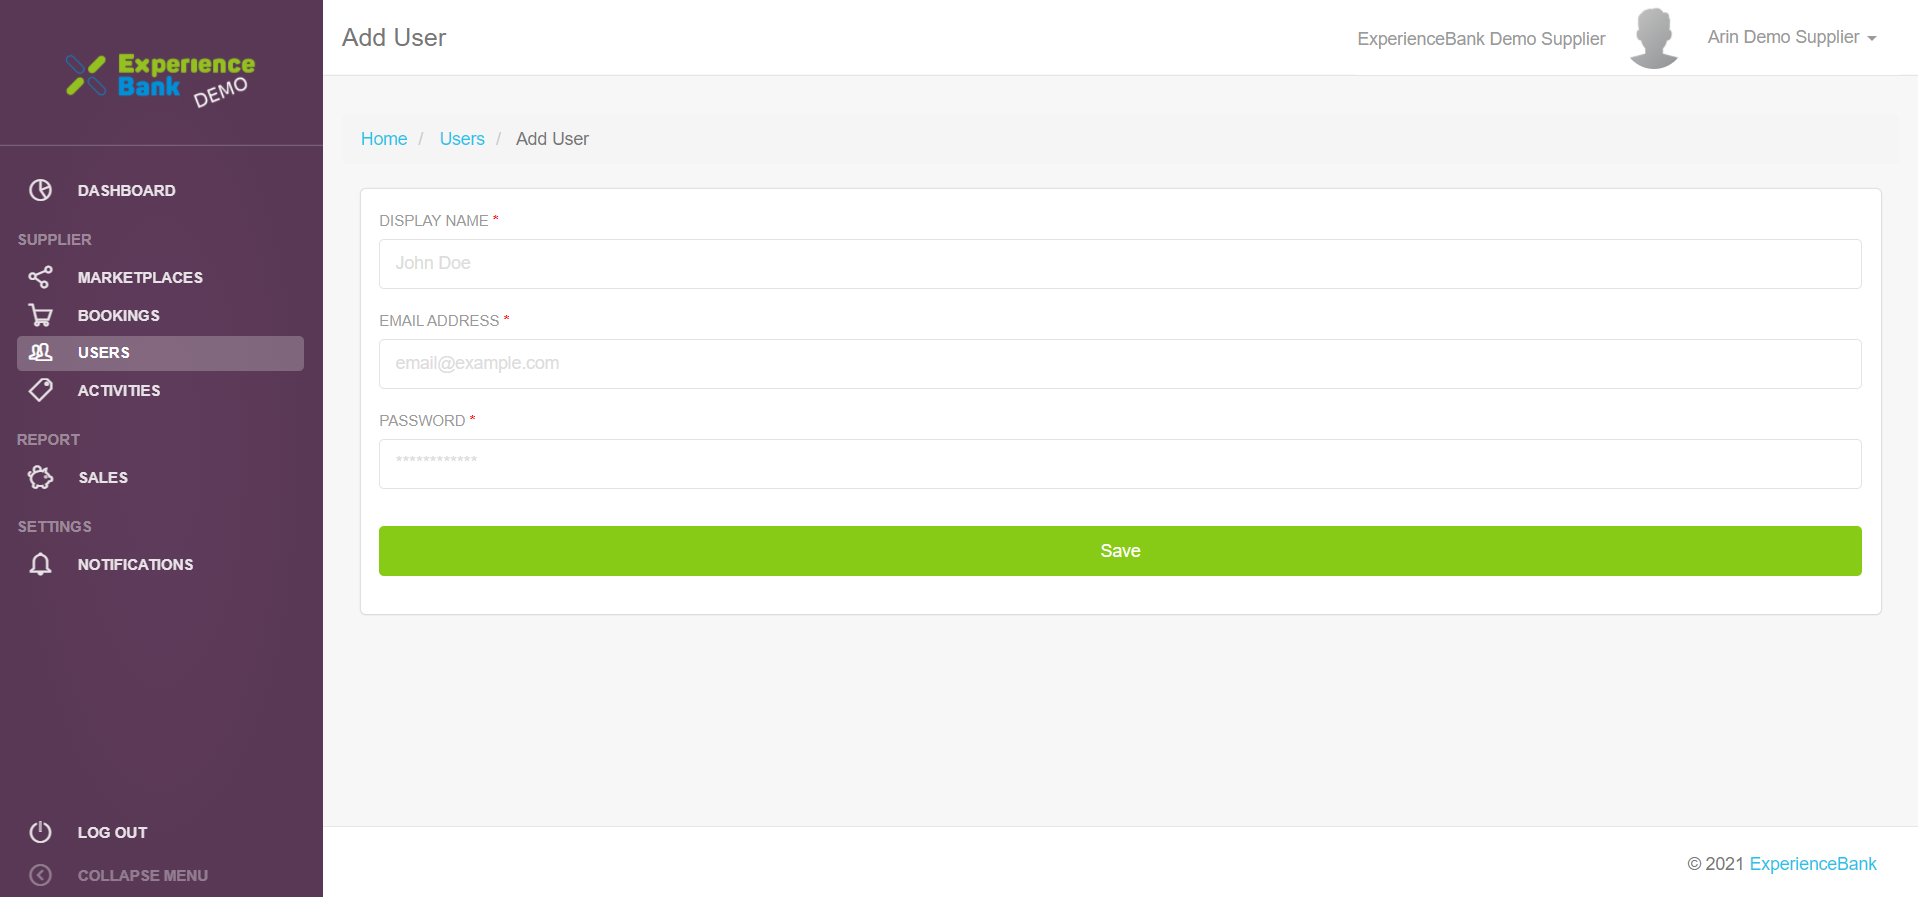
After clicking on the |+ Add User| button, the Add user page appears on your screen with three text fields (DISPLAY NAME, EMAIL ADDRESS & PASSWORD) & the SAVE button.
Step 4. Enter the details of the New user
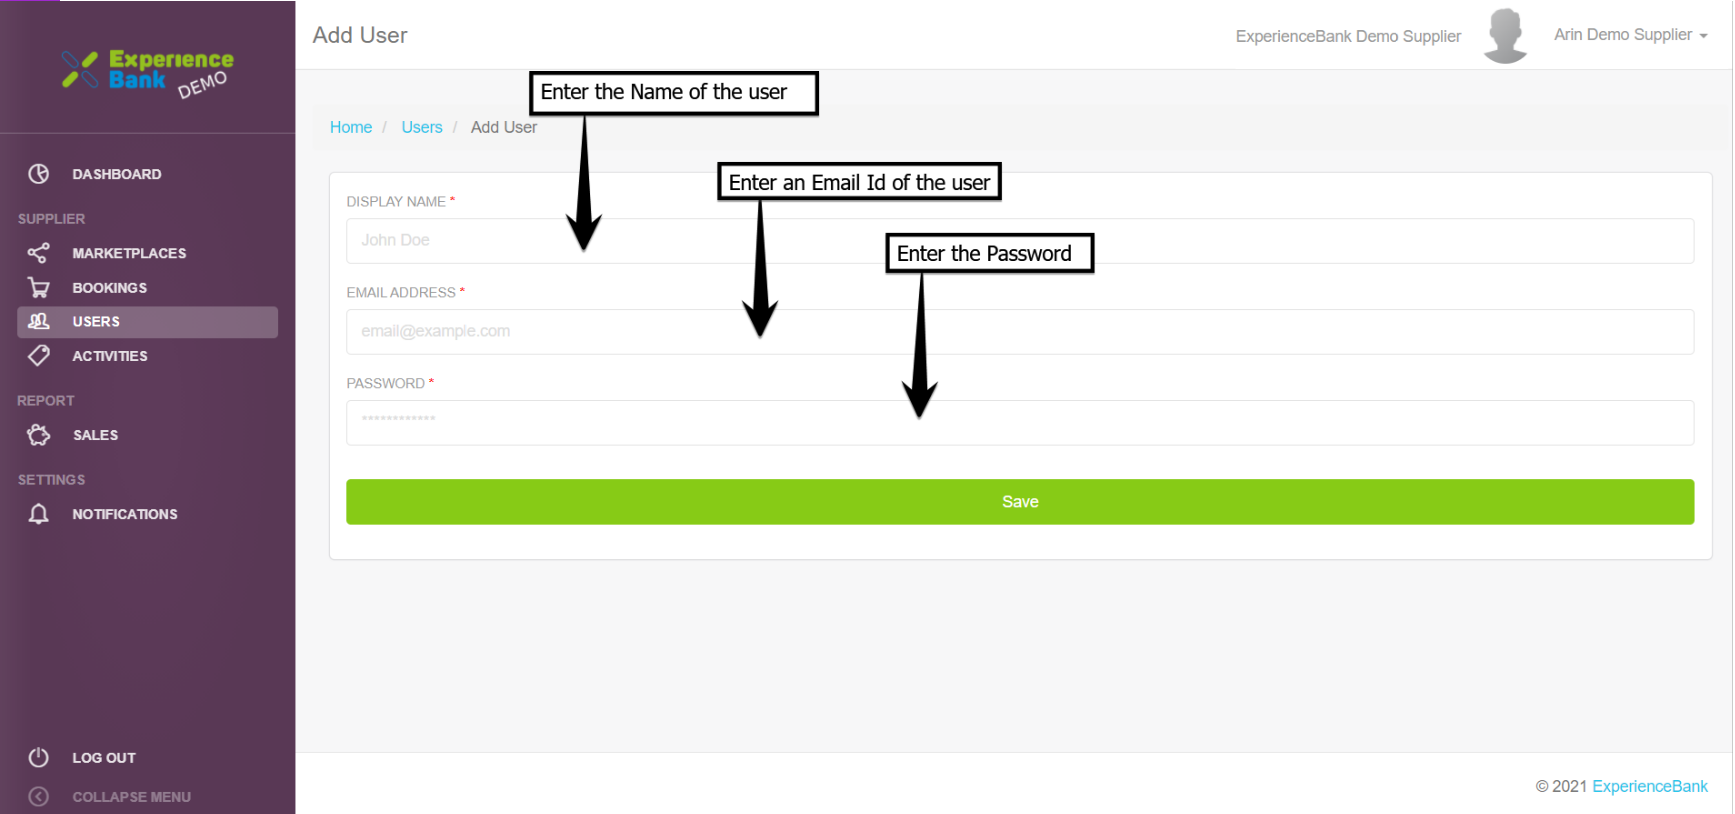
Enter the details of the new user which you want to create an account for. Please see the screenshot below:
Step 5. Click on the Save button to create a new user.
Finally, click the SAVE button. The new user account is created and an automated email will be sent to the new user containing their login information.