
How to connect your products on Viator Extranet.
Overview
This article will help you to understand how you can connect your products from the booking system on Viator Extranet to make them live on Viator portal.
In case you are not registered, First you need to register on Viator by using this link https://supplier.viator.com/sign-up-info and set up your products including start time and price options. If you are already registered please continue to Step 1.
Note – Before moving to Step 1 be sure that the mapping of your Viator products has been performed correctly on ExperienceBank.
- The start time of your product should be the same on both side (Viator as well on your Booking System)
- The Products have active schedules on the Booking system.
Step 1. Login to your Viator Extranet account.
- Click on the URL https://supplier.viator.com/ to open the login page of Viator Extranet.
- Login to your viator account by using your viator credentials.
- After a successful login you will be redirected to the Dashboard of your viator account.
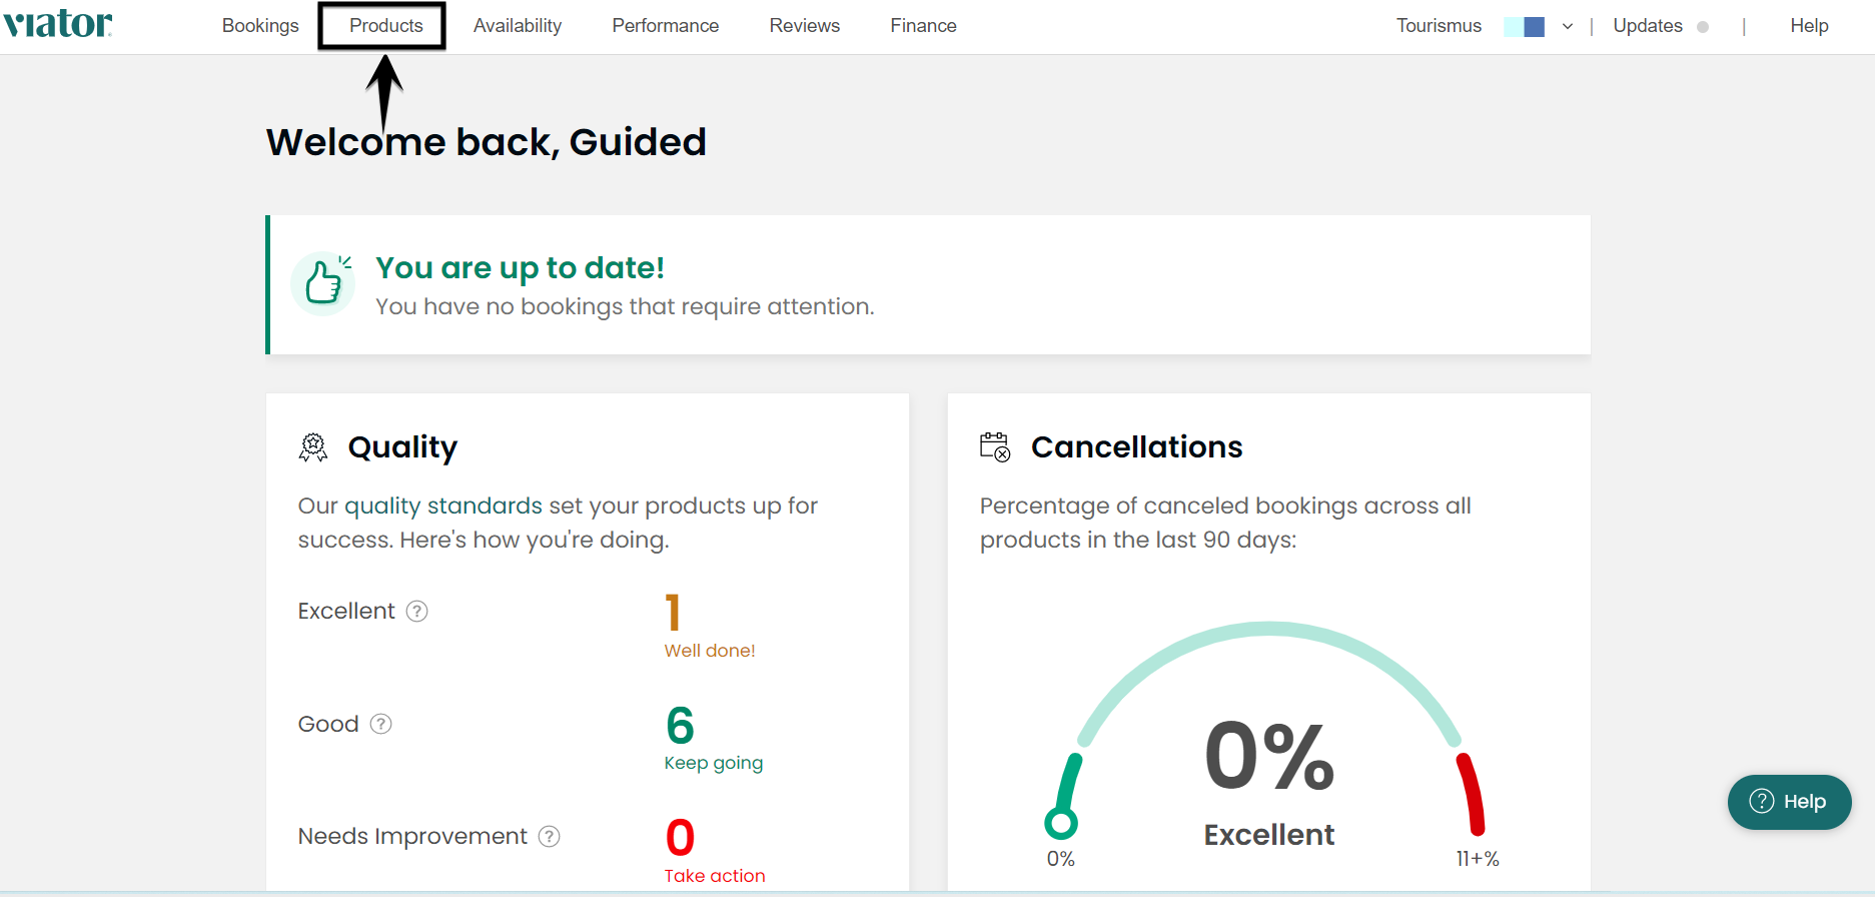
Step 2. Open the products page and search the product from the list.
- You need to click on the Products tab which is in the top menu after the Bookings tab.
- Then you need to search the product in the search bar, which you want to connect.
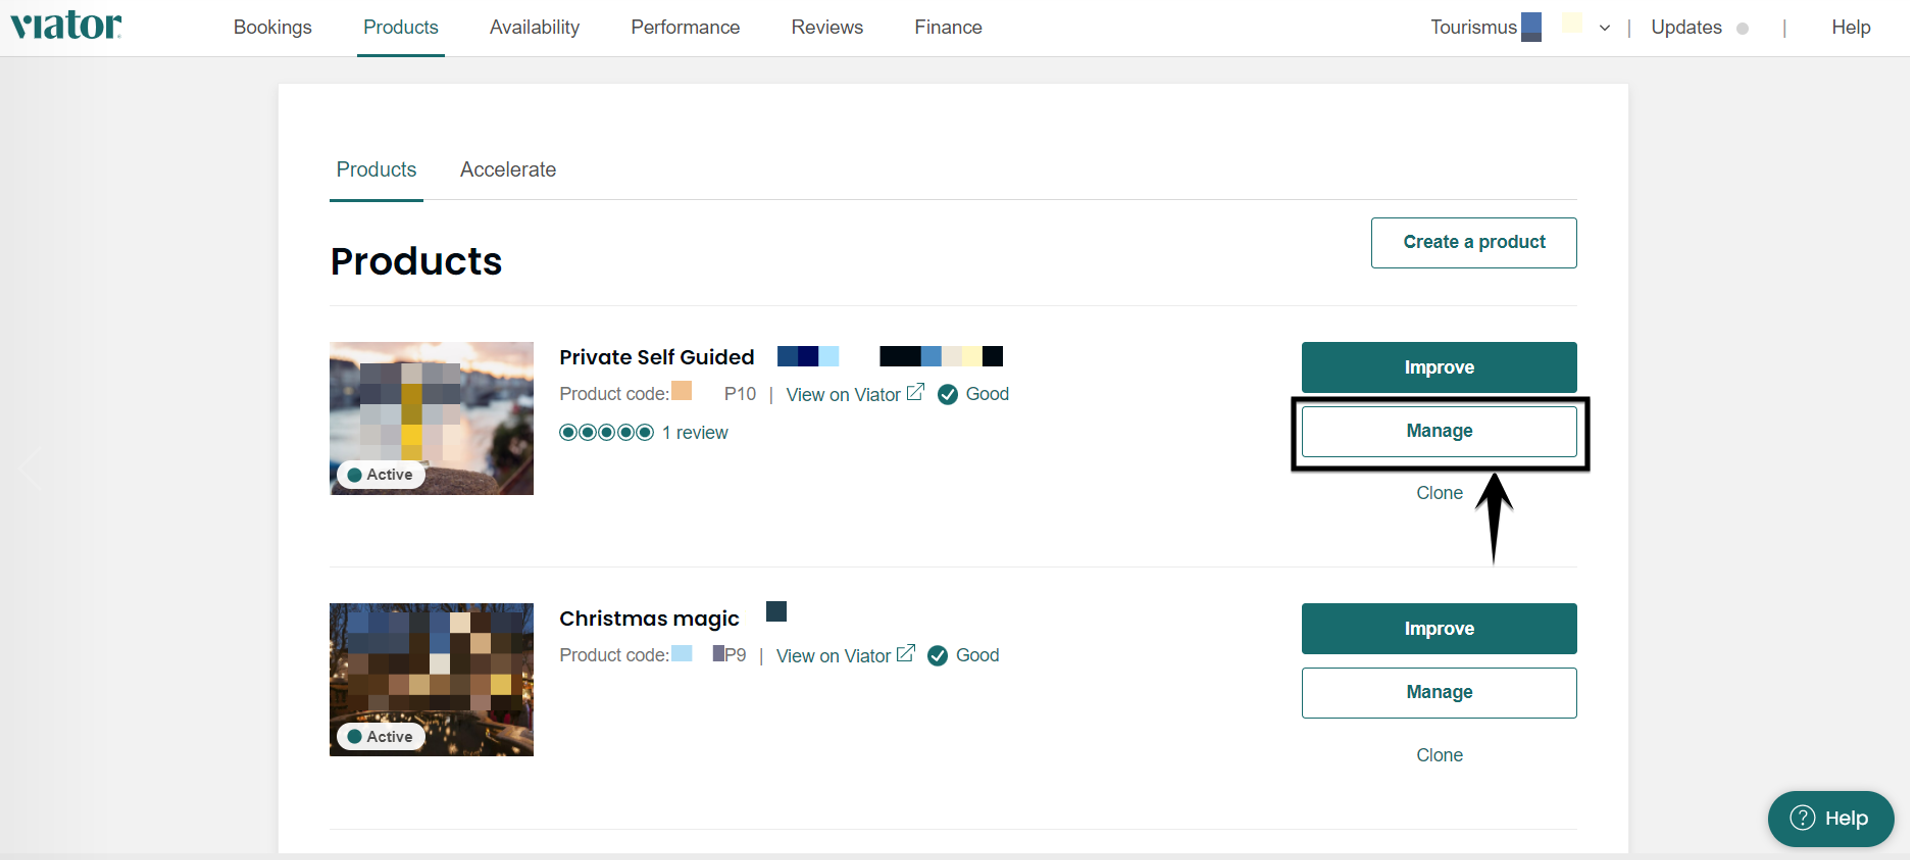
Step 3. Open the product which you want to connect.
- Once you will find the required product you need to open the details page of the product.
- To open the product details you need to click on the Manage button.
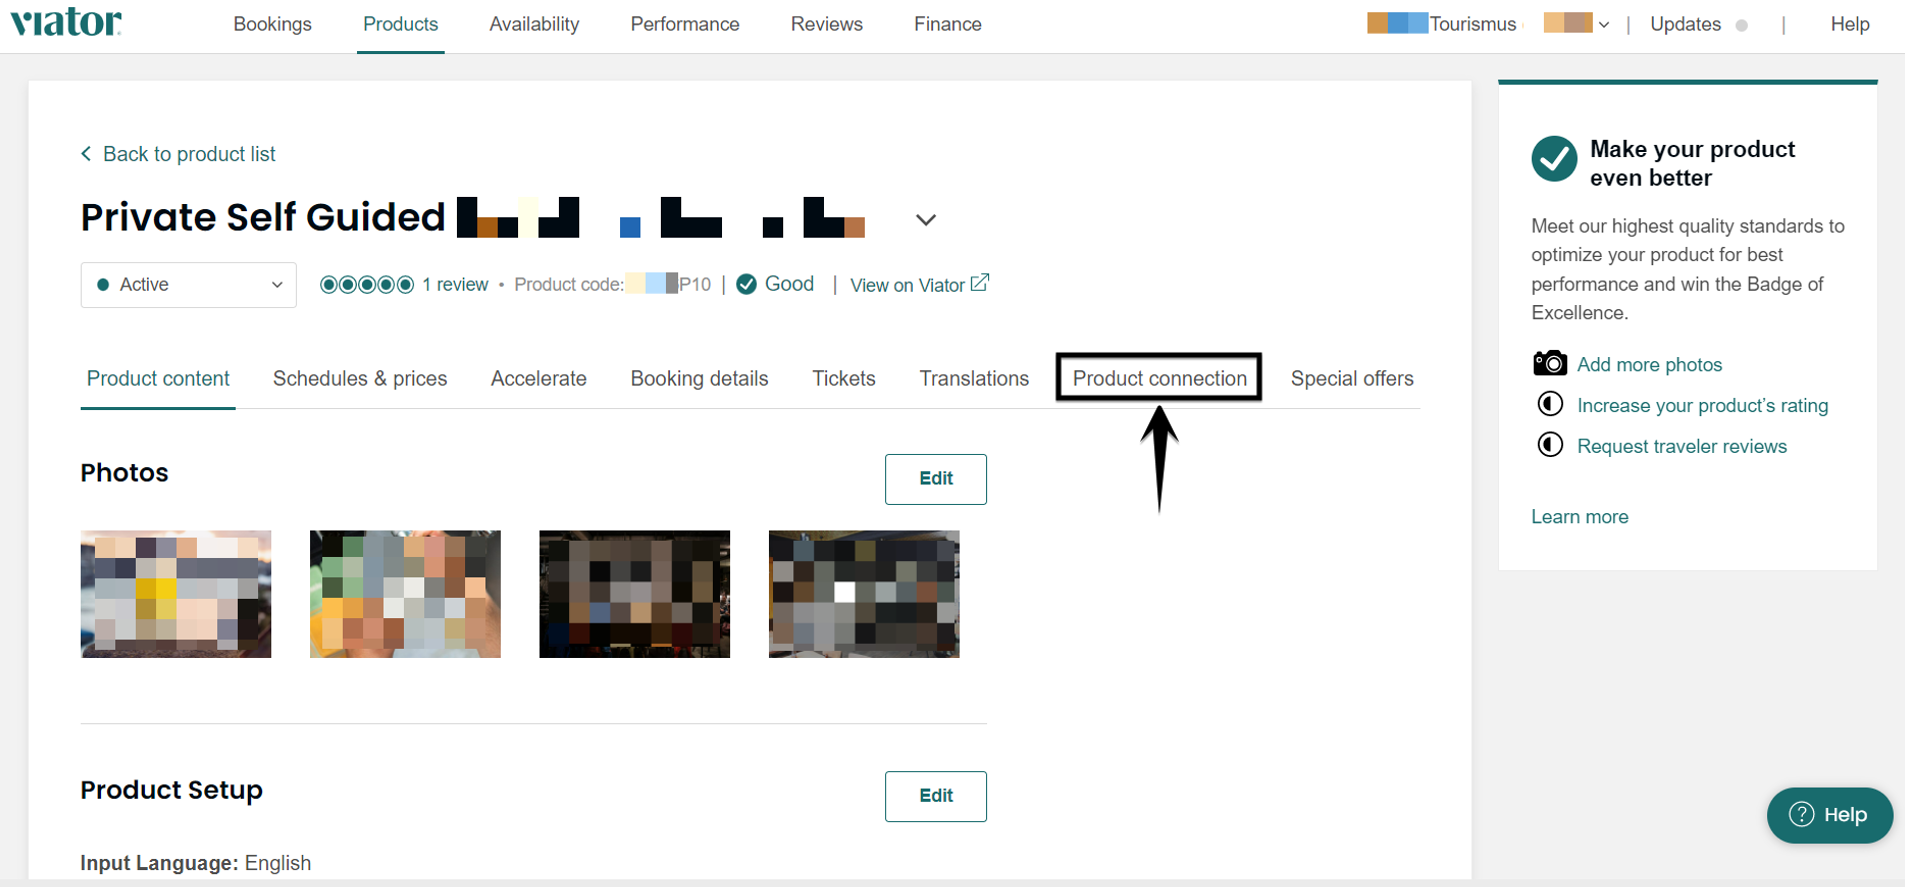
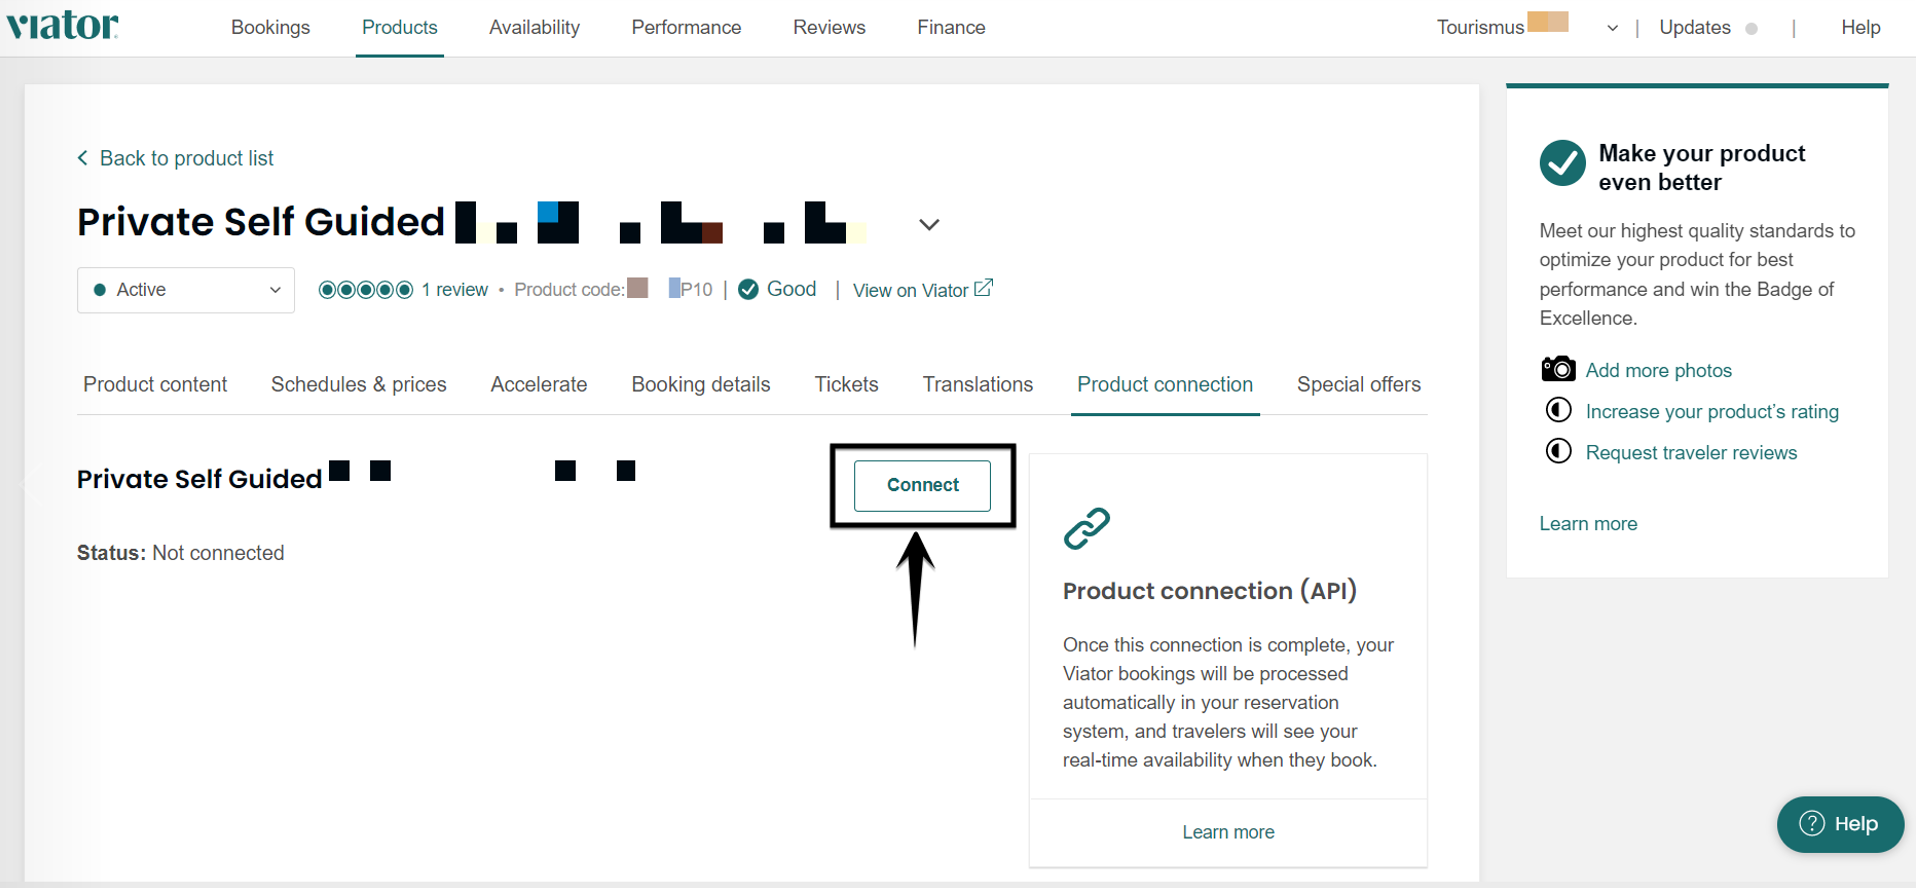
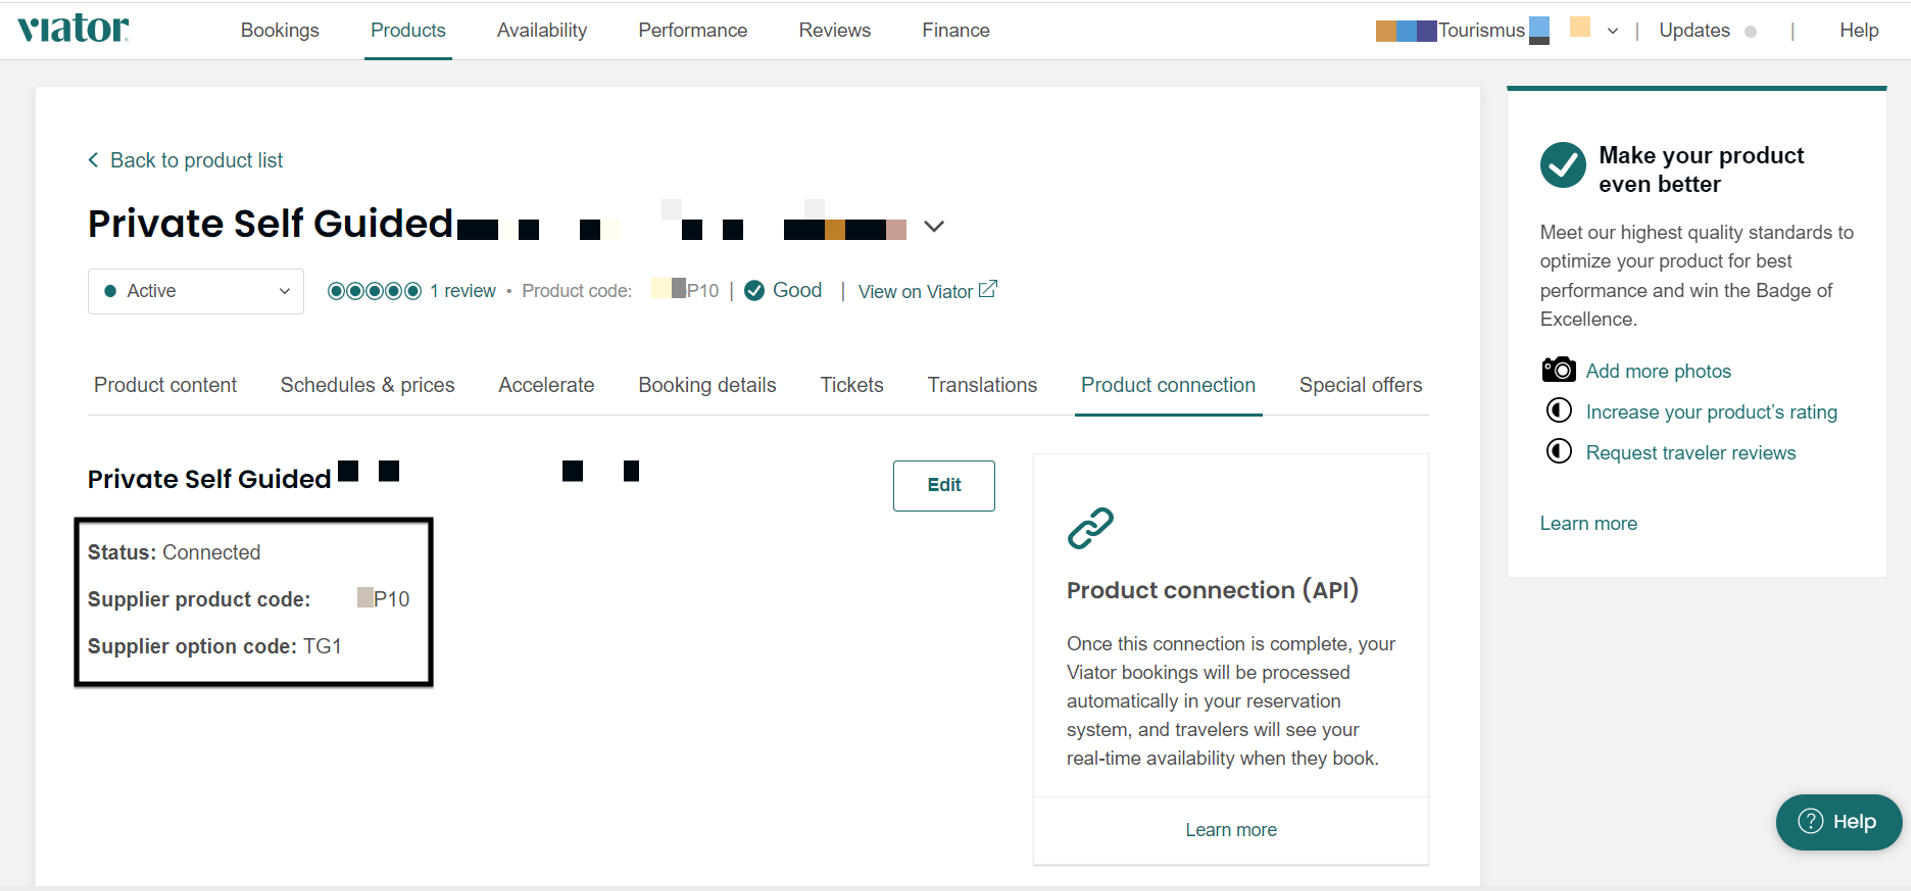
Step 4. Open the Product connection page.
- Once you click on the Manage button you will be redirected to the product details page.
- Then click on the Product Connection tab in the menu to open the product connection page.
Step 5. How to connect products under Product connection.
- Once you enter the Product connection page you need to click on the Connect button.
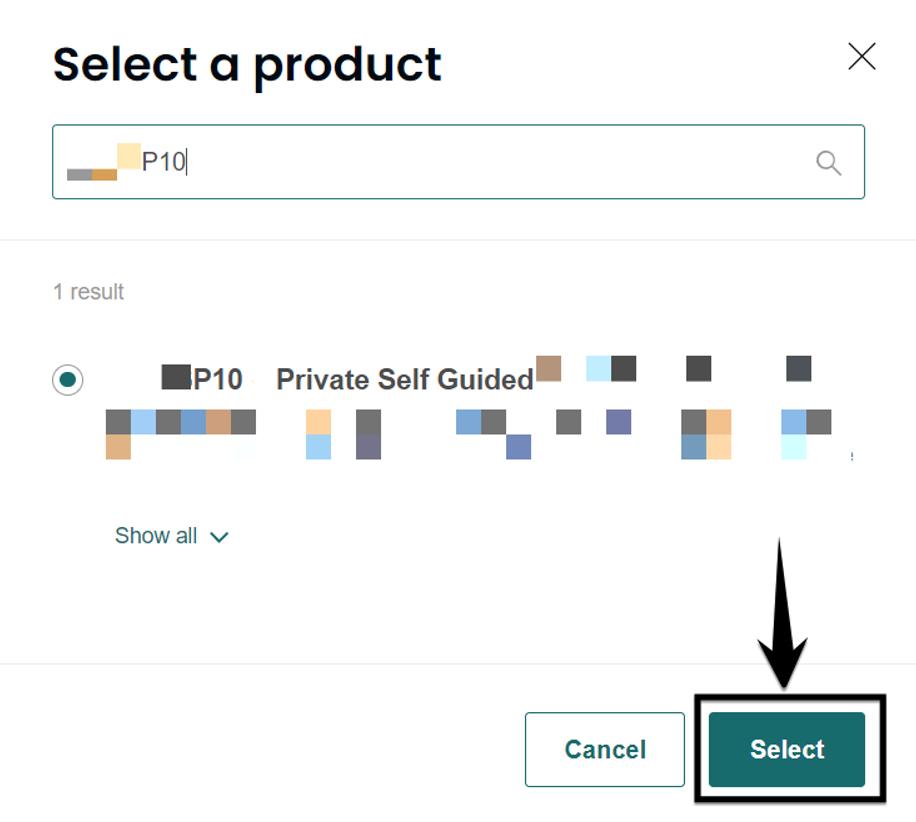
- After clicking on the Connect button a window will appear on which you need to Select a product by typing the product name, code or description.
- We are using product code P10 for searching the product.
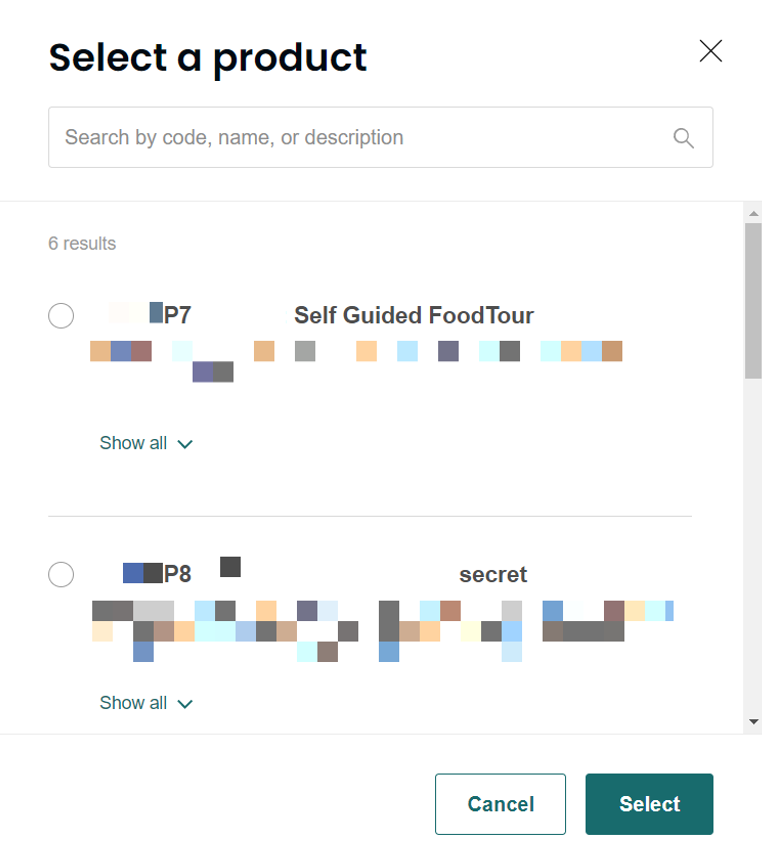
- Once you enter the product code in search bar, “product will appear in the list”
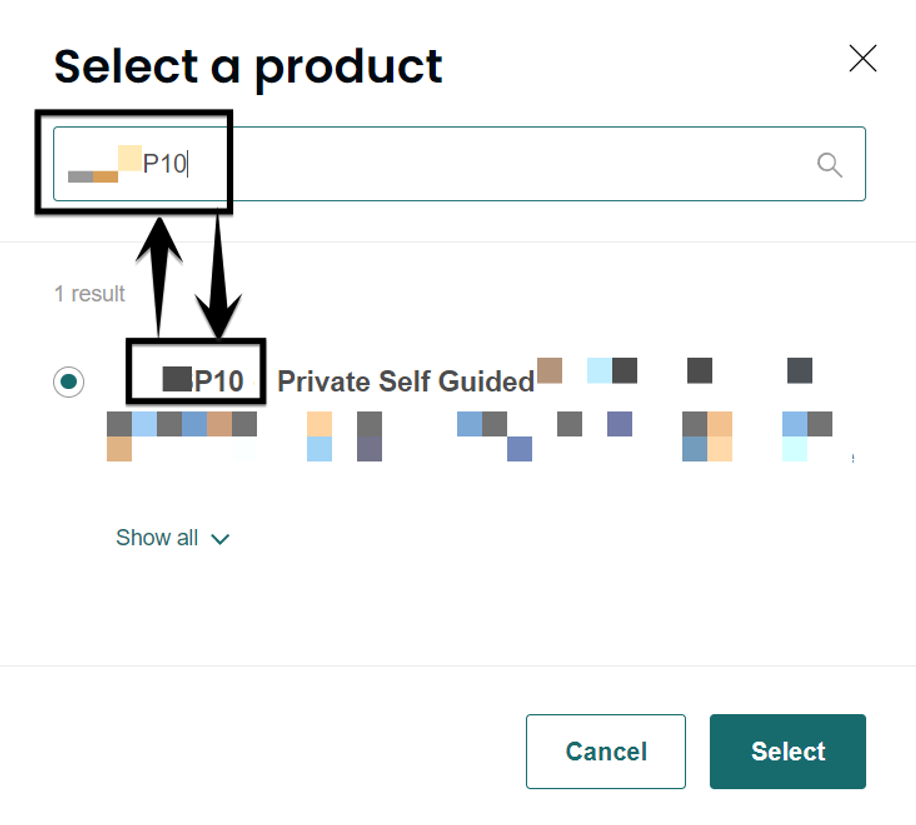
- Now you need to select the product by clicking on the radio button which is available on the front of Product code, In this scenario it is P10.
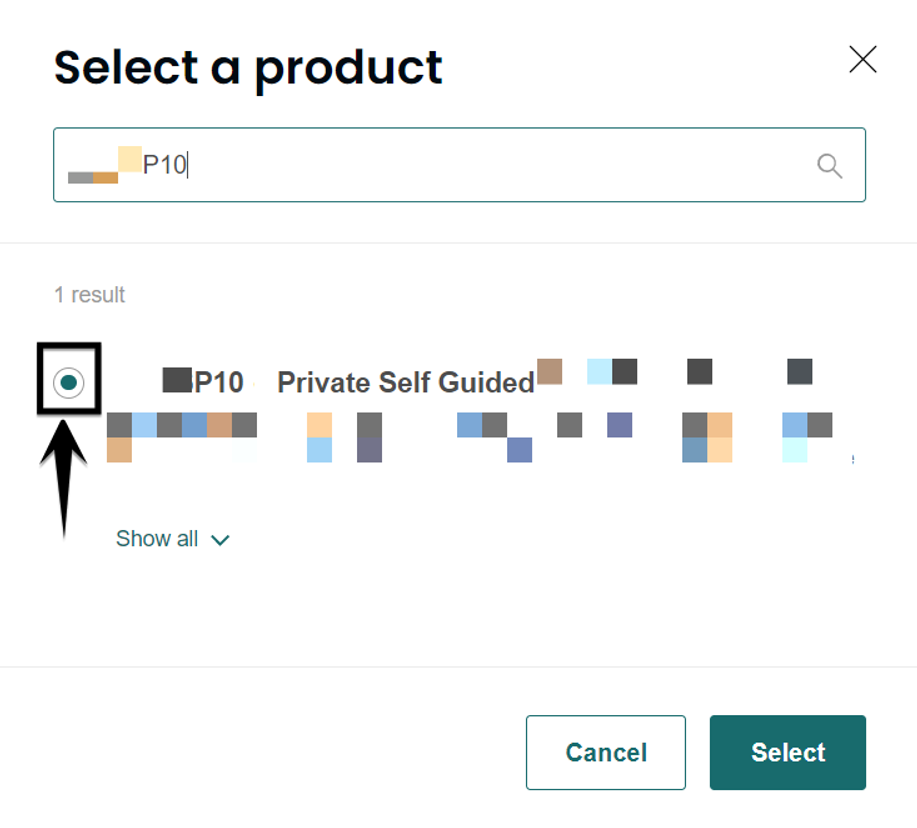
- Once you click on the radio button of the required product P10, You need to click on the Select button to select the product.
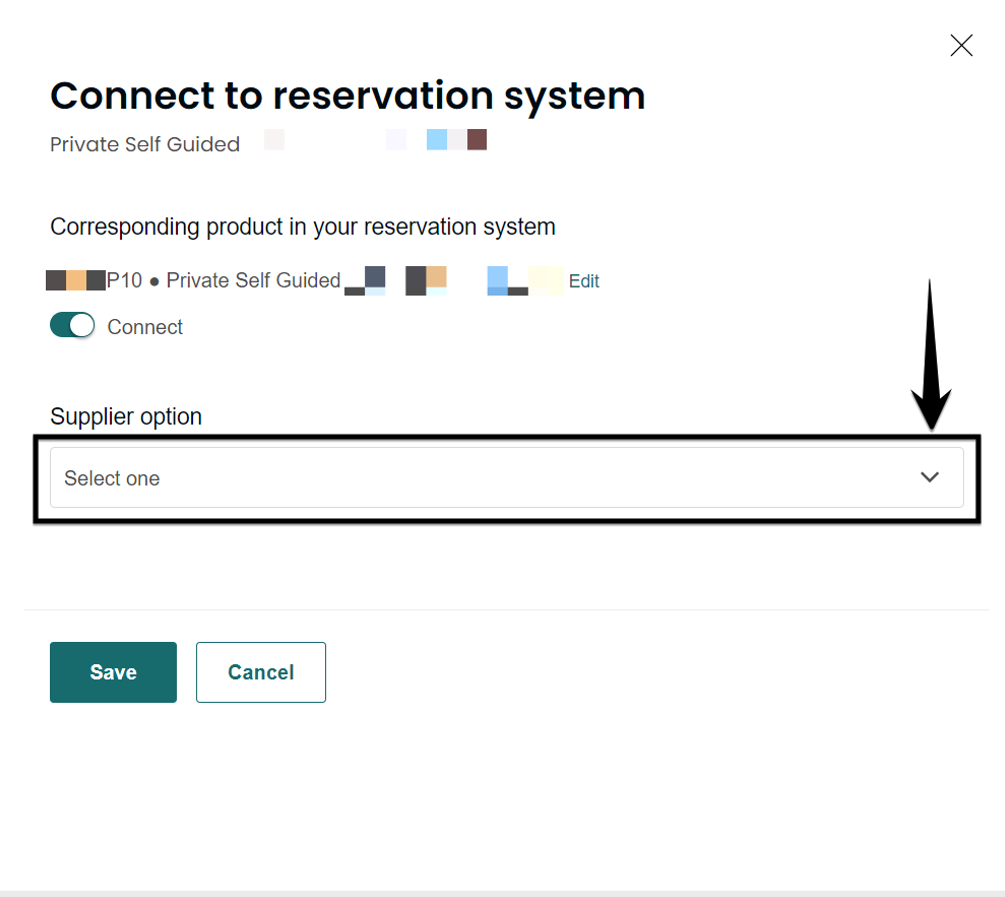
- After clicking on the Select button, the Connect to reservation system window will appear where you need to select the option of your product in the dropdown menu.
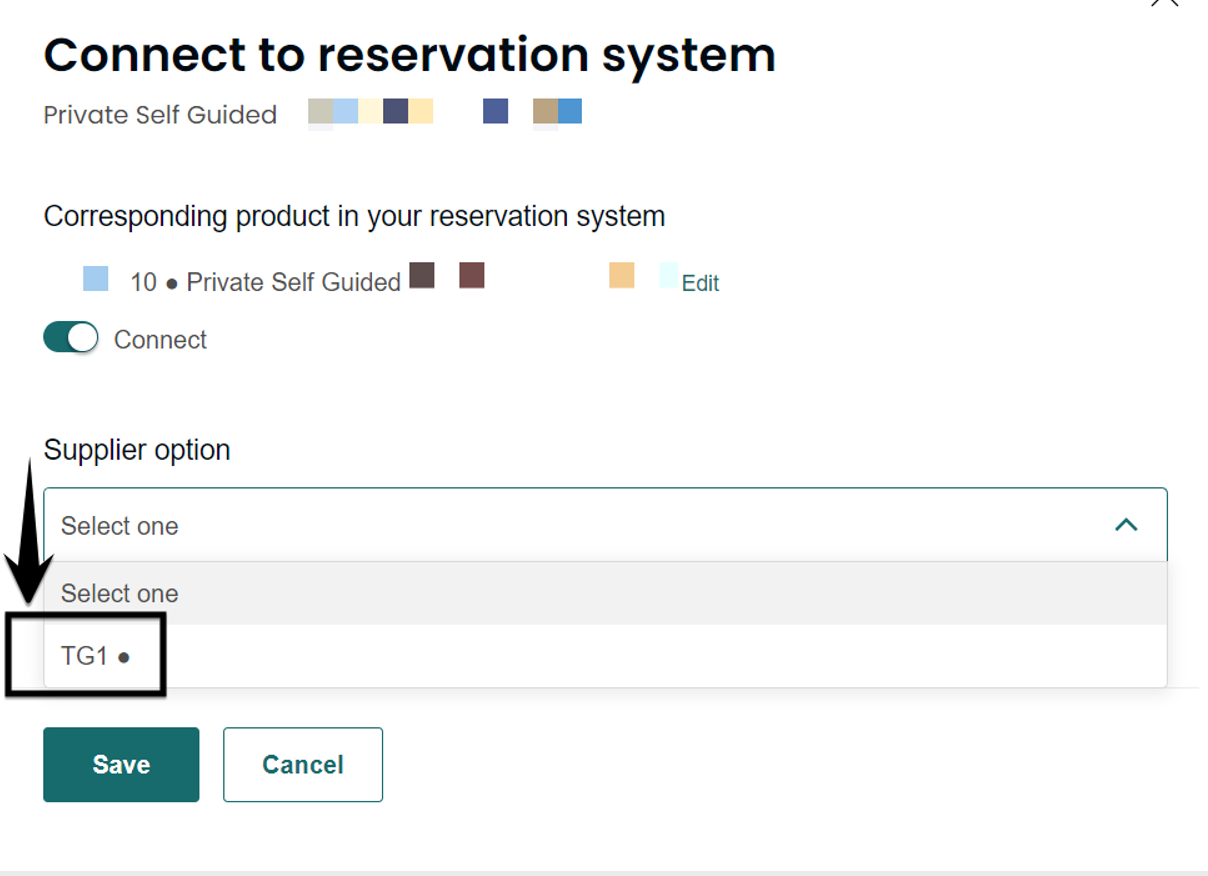
- We used the TG1 as a Option in this scenario.
- Now you need to select the Option from the dropdown menu.
Note – The Options are the schedules that were mapped on ExperienceBank and received on the Viator by connecting the P10 product in our previous step.
- Then lastly, you need to click on the Save button.
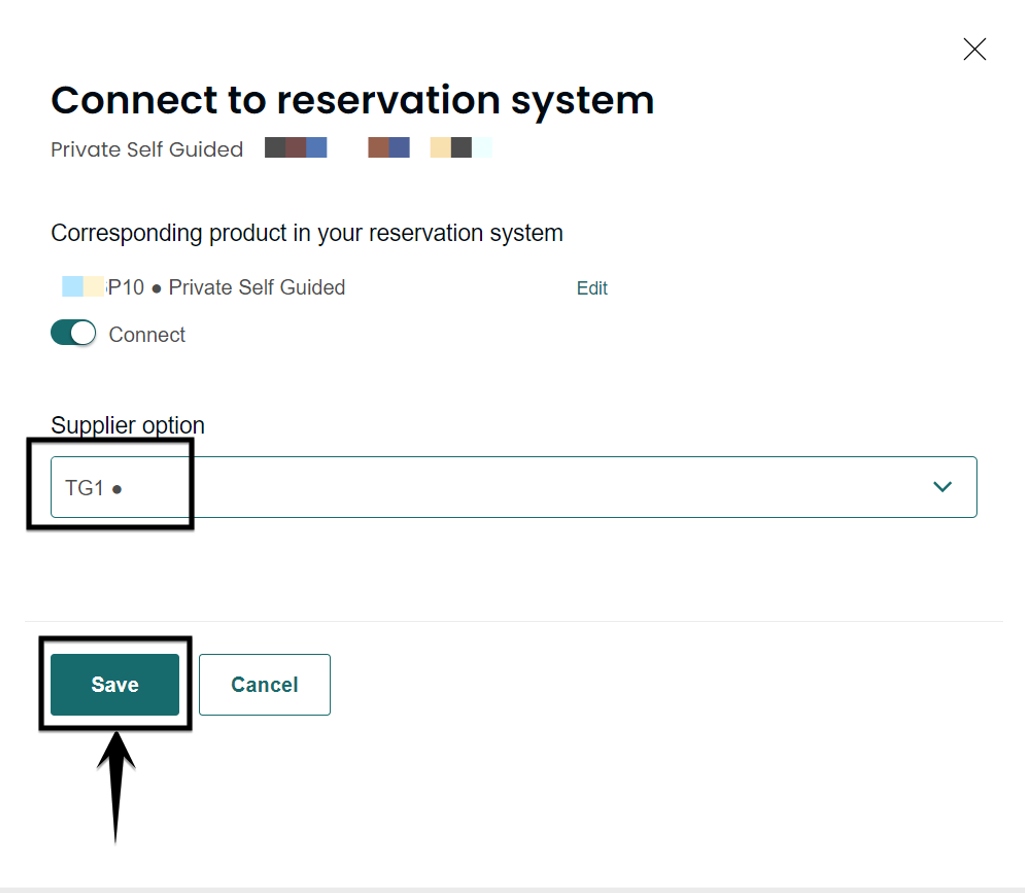
- After Clicking on the Save button your Product will be connected to Viator Extranet.
- Once the product is connected on Viator Extranet, It will be live on Viator Portal and availabilities will be pushed from your booking system.
Important Points
The ExperienceBank & Viator connectivity allows you to exchange the following response and booking information:
- availability
- reservations
- bookings
- rebookings
- cancellations
Viator support Via ExperienceBank
- You can connect multiple viator accounts with your one reservation system account.
- You can’t connect your multiple reservation system account with one Viator account.